Tag Archives: form

How to Cure Target Panic in 5 Easy Steps

Like many archers, I’ve struggled with occasional bouts of target panic over the years. After trying just about everything to cure target panic, I’ve found that some techniques work better than others. In this article we’ll focus on the five best cures for target panic.

What is Target Panic?

What’s so scary about targets that we might panic? Target panic is a breakdown of the natural shot process caused by bad shooting habits. Simply put, it’s a fight or flight response to the pressure of hitting the bullseye. When a victim of target panic tries to acquire the bullseye, he either rushes the shot or fails to settle the pin without panicking.

What Causes Target Panic?

The worst contributor to TP is punching the trigger on a release aid. Shooting a heavy bow beyond fatigue can also lead to TP. A third contributor is mental stress from shooting competitive archery.

When an archer develops bad shooting habits (like punching the trigger), he begins to miss the bullseye. The more he misses, the more he tries to control the shot. Pretty soon this stress turns into a full-on panic. Just holding the pin on the bullseye becomes a physically impossibility. In extreme cases the archer is physically incapable of even raising his sight pin to the bullseye no matter how hard he tries.

Anyone who shoots regularly can develop target panic. Target panic is a maddening condition that wrecks ones confidence and can last for years if left untreated.

The goal of these exercises is retrain your brain not to react to a shot. This article focuses on compound shooters, but applies to traditional shooters as well.

Best Cures for Target Panic

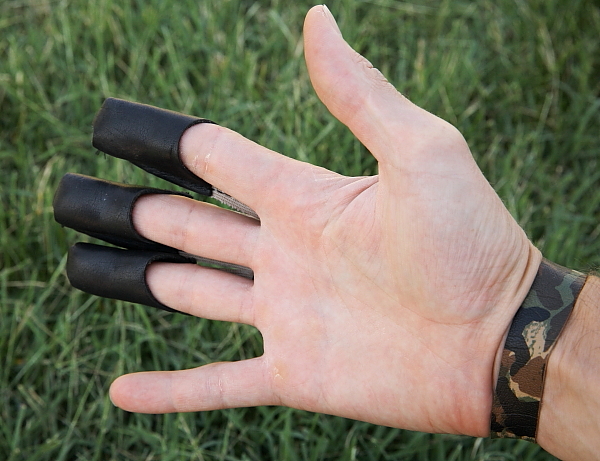
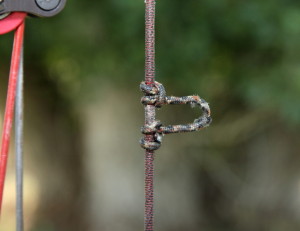
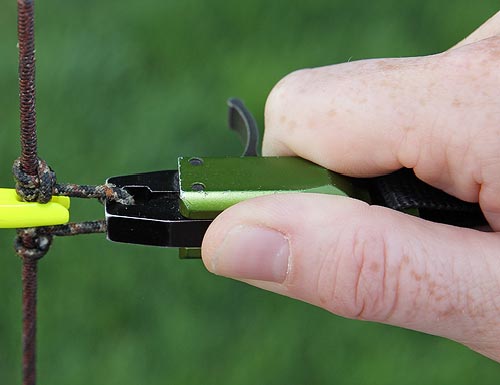
  1. Use a back tension release. You can literally cure target panic in one day by using a back tension release aid. A back-tension release has an adjustable, hinged hook that rotates with your elbow during the shot process. As your shoulder blades squeeze together, the shot eventually breaks naturally. There is no physical way to trigger the release without pulling through the shot using your back. Unlike finger releases, the back-tension release creates a surprise release with every shot. Finger releases are great for hunting, but can cause target panic. Back tension releases are fully adjustable to your desired shot sequence. There are several good models on the market, but the one I used is called the Scott Longhorn Pro Micro.

    Scott Longhorn Pro Micro
  2. Hold on the Bullseye, then Let Down. This is a very simple, yet effective technique. It won’t cure target panic in a day, but it will gradually retrain your brain to hold on the bullseye without stress. Simply draw your bow, let the pin float on the bullseye for a few seconds, and then let down. Whatever you do, don’t shoot! Do this drill several times per session. After a week or two start releasing an arrow with every other draw. If stress creeps back into the shot, start over. Eventually you’ll be able to release the arrow without stress. It’s important not to hold the draw too long or you’ll fatigue out, which only exasperates target panic. It’s never a good idea to keep shooting after exhausting your muscles.
  3. Shoot a Giant Bullseye. Basically you create a huge bullseye out of paper or cardboard and pin it to your target. Shoot the big bullseye from just 10 yards away. Similar to blank bale shooting—where there is no bullseye—this drill is designed to take your focus off aiming, and focus instead on what a surprise release feels like. Be sure to use your back and not your fingers to trigger the release. Gradually reduce the size of the bullseye until you can shoot normally again.
  4. Shoot a Lighter-Draw Bow. A lighter bow removes all the physical stress involved with shooting. Shooting a very heavy-to-draw bow creates physical stress and can lead to target panic. Basically as you fatigue out your mind gets anxious to get rid of the stress. Pretty soon you’re rushing the shot instead of pulling through smoothly. During the off-season I switch to a bow that’s 15 pounds lighter than my hunting bow. I did this initially to save my shoulder, but it has the added benefit of letting me shoot longer sessions without fatigue.
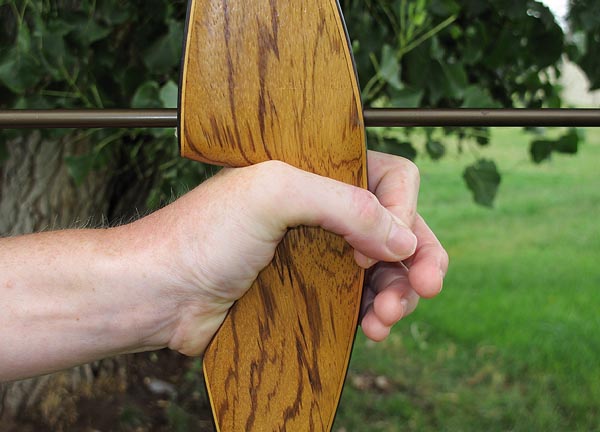
  5. Use a Longer Stabilizer. A long stabilizer on the front of your bow creates resistance to movement at full draw. The longer the stabilizer, the less movement. This is why you see tournament archers with ridiculously long stabilizers protruding three or four feet in front of their bows. For our purposes you’ll do just fine with a 12-inch stabilizer. A person struggling with target panic is prone to quick, jerky movements towards the bullseye. A long stabilizer resists these movements. Once you settle the pin on the bullseye, it stays longer. Whichever stabilizer you choose, just make sure the weight is out front. You don’t want a big, bulky stabilizer that will just add more weight to your bow. The B-Stinger is a great option and even comes with extra weights for customization. Or you could always make your own out of an old carbon arrow and weights found on eBay.

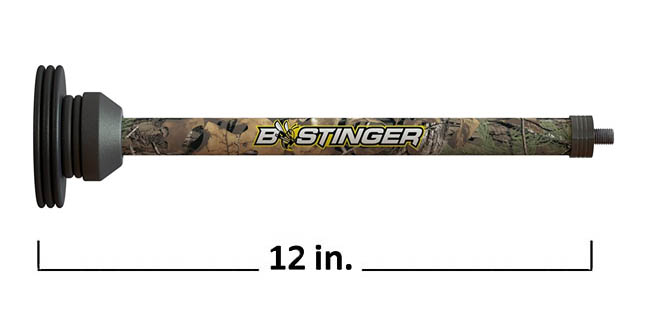
    A stabilizer measureing 12″ or more, and with front weights, will your bow help you stay on target.

A Final Note

The goal of these exercises is to relearn how draw to a relaxed state of mind and body. There are three ways to help you do this. First, don’t hold your breath. Archers oftentimes hold their breath when they draw, but that just adds more stress to the shot. Second acquire the bullseye quickly. Moving your pin slowly to the bullseye creates anticipation. And third, tell yourself it’s okay to miss. Miss on purpose if you have to, but teach your brain that it’s okay to miss occasionally.

Conclusion

If you’ve implemented these five steps then congratulations, you’re cured! If not, start over. Most archers will struggle with bouts of target panic now and then, but don’t panic, it’s easily cured.

You can avoid future bouts by practicing proper shooting techniques. Always strive to use your back muscles and have a surprise release with every shot. Avoid shooting a heavy bow beyond the point of fatigue. Instead use a light-draw bow with a long stabilizer during the off-season. A heavy bow turns archery a high stress activity when it should be fun and relaxing.

I hope this helps. Let me know if you have any questions and happy shooting.

Advanced Archery Technique: The Relaxed State

The Advanced Archery Technique

All suffering is caused by desire.  -Buddha

Over the past several years I’ve taught hundreds of people basic archery. Of all these students, only a handful are what you might call “naturals.” They follow instructions carefully, excel quickly, and break through to the next level at an astonishing pace.

But even these “naturals” eventually hit a wall: their accuracy plateaus, they fatigue out, and eventually falter. At this point they often turn to me and ask, “What now? I’ve mastered the basics, but how can I hit closer to the bullseye?”

As their intrepid instructor, it’s my duty to guide these students to the next level. The problem I had early on–and what my students didn’t know–was that I too was wondering the same thing! When you’ve mastered the basics–that is, when you’re executing the shot sequence flawlessly and still coming up short–how do you increase accuracy?

For the first time in my career I had no choice but to break down my shot sequence and see where potential weaknesses could set in. Here’s what I discovered.

The Problem

The thing that gets between the bow and the target isn’t the arrow,  it’s you! Every archer, no matter how advanced, goes through slumps. A few missed shots quickly erodes confidence by allowing negative factors such as fatigue, discouragement, and desperation into the shot. It’s a vicious cycle: the harder you try, the worse you do.

The Fatigue Factor

Physical fatigue is the greatest negative factor, especially for the beginner who hasn’t yet developed his back muscles. Just as he begins hitting close to the bullseye, he fatigues. But there’s also mental fatigue, caused by trying to over-aim the arrow into the bullseye again and again.  Finally there’s spiritual fatigue, the byproduct of chronic misses. In the end, all this fatigue erodes confidence and creates a downward spiral.

Zen in Archery

From the Zen perspective, all suffering comes from desire. Desire, of course, is healthy and even necessary for any activity. But when desire turns into obsession, that’s when we suffer.

In archery you suffer from your very first shot. You strain physically under the weight of bow while your mind strains to aim the arrow. And when your arrow falls short of the bullseye, your spirit strains from the pangs of failure, resulting in desperation.  In short order, your whole being–mind, body, and spirit–is strained!

I see this all the time. The student grasps another arrow, and another, faster and faster while simultaneously grasping for the bullseye which is rapidly becoming an impossible target. Very quickly he creates the bad habit of high-stress archery, which can take a long time to fix.

So, what’s the fix? It’s simple.

Instead of drawing the bow to a state of high tension, we need to learn how to draw to a relaxed state. Drawing to a relaxed state removes your self from the shot by eliminating negative influences over the arrow. Hence, your bow shoots itself. In Zen archery, eliminating your “self” removes desire, which in turn removes stress and suffering.

The Relaxed State Exercise

  1. Bring only one arrow with you on this exercise.
  2. Set up five paces from a large, blank target.
  3. Load the arrow.
  4. Stand up straight and spread your weight evenly between your feet.
  5. Grasp the string firmly and draw to your face while taking a deep, deep breath.
  6. At full draw, look up and away from the bow. Look at the sky and the clouds and the trees. Breathe out, and back in again. Feel the strength of your body as it overpowers the scrawny bow. Forget the bullseye; no one cares if you hit it anyway! Say to yourself, “I’m more relaxed than I’ve ever been in my life.”
  7. Now let down the draw smoothly; don’t shoot the arrow.
  8. Catch your breath.
  9. Repeat the process, only this time, when you’ve reached your highest  state of relaxation, release the arrow. Don’t aim at the target. Just relax your shooting hand until the shot goes off. This is what a relaxed arrow feels like.
  10. Maintain this relaxed state as you walk to the target and pull your arrow. Repeat this process over and over until it becomes habit.

That’s all there is to it. You are now drawing the bow to a state of high relaxation rather than a state of high stress. You’ve turned a bad habit into a good habit.

Real Life Example

One day I approached a talented young student who was literally drawing a circle around the bullseye with errant arrows. Wide-eyed and desperate, he turned to me and pleaded, “What am I doing wrong?!” I watched him fling yet another arrow just outside of the bullseye. I told him, “You’re trying to hard.” I went on to explain that missing the target wasn’t the end of the world; that his passion for archery–the whole meditative process–was far more important than a single bullseye. I had him breathe deeply and look around at the beautiful mountains. A moment later he calmly drew his bow and sank the next arrow into the bullseye. His face lit up and he hugged me. Years later he still talks about his enlightening experience.

Conclusion

Your bow is designed to shoot a perfect arrow every time. The arrow only misses if you let yourself get in the way.

For every student that asks, How can I shoot more accurately?, there are a few others who comment on how meditative archery is; how it relaxes and focuses the mind. These students typically aren’t the best archers at first, because to them the process outweighs the result. I view these students as the real naturals, and they even prove it when, eventually, their arrow finds the bullseye with seemingly little effort.

Shooting in a relaxed state is the secret to Zen archery. On a grander scale, you might say that living in a relaxed state is the secret to a Zen life!

Step #3: The Release Arm

Proper Arrow Release

The release arm, (aka the string arm or shooting arm), is the arm/hand that holds the string while drawing the bow. If you are right handed, then it’s your right hand.

In traditional archery you have the option of wearing a shooting glove or finger tab to protect your shooting fingers (index, middle, and ring finger).

Although it is perfectly fine to shoot with bare fingers on a light-poundage bow, it can be very painful with a heavier-poundage bow. A release “aid” or glove also allows the string to slide off the fingers evenly and with less friction.

IMG_9095
Glove-style release aid.
IMG_9094
Finger tab release aid.

All newer-model compound bows should be shot with a mechanical release aid. Unlike traditional bows (longbows and recurves), compound bows are designed to be shot in-line with the arrow, string, and rest.

With traditional bows, the string naturally oscillates from side to side as it comes off your fingers. This is normal, and the arrow will straighten itself out in flight.

With compound bows, the arrow leaves the bow at a much higher speeds, and therefore, oscillation will cause the arrow to wobble and shed energy as it tries to re-adjust itself in flight. Therefore, the arrow should be shot with perfect alignment to avoid any oscillation.

Compound Bow Release

In order to accomplish this, the arrow attaches to the bowstring inside of a D-loop that’s tied to the bowstring. Next, a mechanical release aid attaches to the D-loop to draw the bow back. This keeps the shooters arm aligned perfectly with the arrow.

017
Compound bow D-Loop.
MechRelease
Mechanical release aid for compound bows.

As an aside, my person favorite release is the Fletcher .44 Caliper Release. This is the smoothest, most reliable, and least expensive release I’ve used.

Traditional Archery Release

With traditional archery, you have two options for grasping the string: 1) One finger above and two below the arrow nock, or 2) Three fingers below the nock.

The advantage of having three fingers below is that it brings the arrow closer to your eye. This helps with aiming. I’ve personally found that three fingers below dramatically increases my accuracy. Try it both ways and see which method works best for you.

006
One finger above and two below.
Three fingers below. This brings the string closer to your eye.


Click here for the next lesson: Step #4: Releasing an Arrow

Step #2: Gripping the Bow

How to Grip the Bow

The bow arm (or bow hand) is the arm that holds the bow up. It is sometimes referred to as a dead-post because it doesn’t really do anything special, other than hold the bow. That being said, your bow arm has a great effect on accuracy. This applies to both traditional and modern bows.

Bow arm grip.

Steps to Properly Grip the Bow

1.  If you are right-handed, grip the bow with your left hand. First off, you’re not really “gripping” the bow, you’re simply holding the bow and pushing it forward as you draw back. If you grip the bow too tightly you’ll torque it from side to side, causing you to miss left or right.

The best way to avoid torque is to lightly touch the tips of your thumb and index finger together and allow your other fingers to remain relaxed.

Use a loose grip on the bow to avoid torque.

2.  The bow’s grip should settle in the “throat” or “V” of your hand (between your thumb and index finger.) The grip should also line up just to the thumb side of your “life line.” In other words, the bow is supported by the big, fleshy part of your lower thumb.

For maximum support, keep your wrist straight and in-line with your forearm bones (as seen in the photo above). If you allow your wrist to bend outward it will cause the bow to settle at the base of your thumb, which causes movement. As you relax your grip on the bow, you will feel the bow settle at a balanced fulcrum point in the throat of your hand.

Correct wrist alignment.
Incorrect wrist alignment.

3. The most common mistake for beginner archers is to allow the elbow to bend downward. This increases the chance of slapping your arm with the string. Therefore, you must draw with your elbow up and bent slightly outward.

Elbow up and bent slightly outward (CORRECT).
Elbow pointed downward (INCORRECT).

4. As you draw the bow back, your bow arm pushes the bow forward. Remember, your back muscles are doing all the work. As you squeeze your shoulder blades together, your bow arm and your shooting arm apply pressure in opposite directions. This is called “pulling the bow apart.”

On the shot, both arms continue in opposite directions. This is called “follow through” and will be covered in a future post.

Click here for Step #3: The Release Arm