Tag Archives: tips

Pre-Season Mule Deer Scouting

Preseason Scouting

Scouting is hunting; it’s not optional. As rule of thumb, you should spend at least twice as much time scouting as you do hunting. With fewer trophy opportunities these days, it’s best to locate big deer and big deer habitat well ahead of hunting season. Simply put, the more days you spend scouting in the preseason, the less time you’ll waste during your hunt.

Scouting doesn’t mean just locating deer, but locating feed and water, bedding areas, escapes routes, game trails, and sign. You don’t have to actually see a big buck to know he’s there; just look for tracks and read the signs.

Multiple Opportunities

Once you’ve located or even patterned a buck, you need to devise multiple game plans. Bowhunting is a low-odds game which means you always need a backup plan, or maybe several. What do you do if you bust the buck on opening morning? Where do you go next? What if that doesn’t work? What if someone else shoots your target buck out from under you?

Effective scouting means always having a backup plan or even a backup buck. Whether I’ve found a great buck, or if I’m just hunting promising new areas, I always have plan A, B, C, D, and so on that will at least cover the first few days of the season.

Part of planning is to anticipate variables, like changing wind direction, and then figuring out the best time of day for a stalk. One method that works for me is to make a list of likely big buck areas and then assign the best time frame to stalk based on thermals, bedding areas, and other factors. For each area I’ll mark morning, evening, or both.

E-Scouting

With modern technology, such as super-optics, trail cameras, GPS with topo maps, and 3D internet mapping, you can now scout anywhere in the country, 365 days a year, even late at night in your underpants.

E-scouting is great for locating promising new country, but nothing beats boots on the ground. Physical scouting accomplishes two important things: first, you’ll become intimately familiar with the terrain you’ll be hunting, and second, you’ll get plenty of pre-hunt exercise while enjoying God’s natural splendors.

Trail Cameras

Trail cameras are a valuable piece of scouting equipment. Not only do cameras tell me when and where the bucks are, but they also tell me where they are not. Any hunter with a limited amount of scouting time will benefit from setting up an array of cameras in likely buck areas.

The best locations to hang cameras are in prime feed locations, secluded water seeps, game trails, bedding routes, and water routes. Even better locations include pinch points, saddles, funnels, and trail intersections. A month or two before the hunt opener I’ll set up four or five cameras covering an area of about five miles. By the hunt opener I have a pretty good idea of the quality and quantity of bucks in my area.

Avoid bumping deer while scouting, especially in the weeks leading up to your hunt. Check your trail cameras during the day when bucks are bedded and less likely to notice you.

Quality Optics

I can’t over-emphasize the importance of quality optics. Binoculars and spotting scopes open up the vastness of the mountain, and quality optics even open up the shadows during the critical morning and evening hours when big bucks are likely to be moving.

The strength of your spotting scope depends on the type of terrain you’ll be hunting. In thick timber country with limited sight distance you’d probably be fine with a 48x, or maybe just 40x binoculars. In this case it’s more important to identify big buck tracks and droppings than to actually see a deer. If you know what you’re looking for, you’ll find the deer.

In open or vast country I would recommend a high-quality, 60-power minimum spotter with a large objective lens that gathers plenty of light early and late in the day. Just beware that spotting scopes in this range can get very pricey and very heavy to pack around.

Where to Look for Big Bucks

When scouting a new mountain, the first step is to locate prime feeding areas. Begin by searching south- and east-facing slopes, especially in areas adjacent to thick timber or steep bedding cover.

East-facing slopes tend to grow better feed than north and western slopes because they get more sun early, and then fall into shade later when the sun is hottest and thus hold more ground water.

Next, look for secluded stands of aspen trees. Aspens only grow where there is an abundance of ground moisture. Not only do deer love to eat aspen leaves, but the myriad of succulent forbs that grow in these areas as well. In the early season, aspen groves provide an ideal bedding area because the ground is cooler.  In late fall as bucks get ready to shed their velvet, they spend more time near scrub aspens which they rub their antlers on.

While investigating likely feeding areas, scan the ground continually for large tracks and droppings. Also watch for areas with plenty of chewed-down vegetation. Once you’ve identified prime feed, follow any trails or large deer tracks leading in and out of the area. At the very least, these trails will point to likely bedding areas. Even if you lose the trail, you’ll still get an idea of which direction the deer are coming from or going. Big bucks have relatively small home ranges, so you should have little trouble locating likely bedding areas.

Final Note

It’s always possible that your traditional hunting area will go downhill or be lost to the crowds. So you need to be adaptive and mobile, always searching for promising new areas. If you didn’t draw a tag this year, or you just have extra time on your hands, it’s always a good idea to investigate other units or new areas just to see the potential. You don’t need a tag to scout, so get out there and do some camping and hiking. You never know what you’ll turn up.

Conclusion

Scouting is hunting and should be taken seriously. Just drawing a decent tag is quickly becoming the hardest part of hunting. So when it’s your time and your tag, don’t waste valuable hunting days looking for deer that you could have found during the long preseason months.

How to Blood Trail Wounded Animals

Blood-Trailing Wounded Animals

Sooner or later every bowhunter will have to deal with a poorly hit animal. An ethical hunter must do whatever it takes to follow-up and recover wounded game. Arrow-hit deer rarely go down immediately, so every hunter needs to understand the basics of  blood-trailing. In this article we’ll look at some tips and tactics for tracking wounded deer.

An arrow kills a deer differently than a bullet. Bullets rely more on shock and devastating tissue damage, whereas an arrow kills either by massive blood loss due to arterial damage, or through asphyxiation by deflating the lungs.

A third and much less effective method is septic shock. Septic shock, or blood poisoning, is the result of gut-shot animals slowly dying as their stomach contents and bacteria gradually overwhelm the blood stream. Basically the deer dies from a full-body infection over the course of several hours or even days. Oftentimes the animal is lost because it bleeds very little and covers lots of ground.

Give it some Time

Unless the animal goes down within sight, you need to give it some time to die. Even if you’re confident in a heart or lung shot, you should still wait a half hour minimum before tracking.

If you suspect a gut shot, wait at least two or three hours before tracking, and then proceed very cautiously while glassing ahead. If it’s very cold out, it would be probably be fine to leave it over night.

Whatever you do, don’t go barreling in on the deer. Arrow-shot deer sometimes don’t realize they’ve been hit and will only run a short distance before bedding down. You do not want to bump the animal, but if you are able to stalk close enough, try to get a second arrow in the animal to put it out of its misery.

Weather Factors

You do not want to leave a mortally hit animal sitting for several hours in hot weather. Even a marginally hit animal will slow down and stiffen up within a few hours, so possibly bumping him is still better than letting the whole animal spoil overnight. Just use your best judgment based on the conditions you’re dealing with.

In rainy or snowy weather you should hasten your tracking job. Water will quickly wash away any blood, and snow can cover it up.

Where to Start

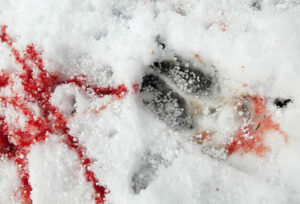
Immediately following your shot, mark the spot you shot from with orange tape, and then mark the place where the deer was standing. Next, see if you can find your arrow and inspect it carefully. Bright red, bubbly blood is usually lungs. Any green smears or foul smells indicates stomach, and very dark blood can anything from muscle to heart or liver. Heart shots are obvious as they tend to bleed profusely.

Once you’ve determined the quality of your hit, try to pick up the blood trail. The secret to successful animal recovery is moving slowly, as if you are still-hunting. Make very little noise and glass ahead frequently. If at all possible, move with a favorable wind.

While blood-tracking, plan on following both blood and tracks. Sometimes a deer will bleed completely internally, in which case you will rely more on tracking than blood-trailing. Fortunately running deer tend to leave very deep and obvious tracks accompanied by torn-up ground.

Inevitably you’ll get stuck with a very sparse or problematic blood-trailing job. If the blood trail is very light, you should follow these guidelines:

Tips for Following Sparse Blood Trails

  1. Don’t step on or disturb any blood specks or tracks. You may have to return back to these clues later on.
  2. Continually mark the blood trail as you go, either with a GPS, orange tape, or toilet paper. By keeping track of the trail you may be able to determine the general direction the buck is headed.
  3. In places where you are unable to see tracks, you can still determine the direction of travel by reading blood splashes: they always splash forward. If the blood trail is sparse, you can tell the direction of travel by which side of the grass the blood is on.
  4. In the evening you might have to track faster. It’s much harder to trail a buck in the dark, but if you must just be sure to have a very bright flashlight. This will not only help you locate more sign, but will light up the deer’s glowing eyes far ahead so you don’t bump him further.
  5. If the trail runs cold, consider enlisting the help of a blood-trailing dog. Dogs trained to follow blood trails are becoming a popular method for recovering wounded game. Once the deer goes down, it won’t last long sitting in the field, so consider getting the dog handlers contact information before the hunt.
  6. If you lose the trail completely, you will have to employ a “grid-search” beginning where the last sign disappeared. At this point you should be able to “guestimate” the deer’s general direction of travel. Use your GPS to keep track of everywhere you’ve been and where you haven’t. Because you are now on a timer, grid-searching should be done with as many helpers as possible.

Final Thoughts

Contrary to popular belief, wounded animals don’t go directly to water, nor do they run directly downhill. Rather their first inclination is to put as much distance between you and them as possible. Given enough time the animal will eventually seek out water, but don’t count on it.

As for direction of travel, I’ve seen mortally wounded animals run uphill or downhill. But more often they side-hill or slant downhill over very long distances. Once again, every shot situation is different, so use your best judgment.

On rare occasion a deer that seems mortally hit will escape and make a full recovery. This happens a lot with high hits in “no-man’s-land,” as it’s sometimes called. Other times the arrow may have only contacted muscle tissue. Either way, you’ll likely never catch up to the animal. That doesn’t mean you shouldn’t try; it just means there are times when you must throw in the towel. Only experience can tell you how to proceed.

How to Conquer Buck Fever


What is Buck Fever?

Buck fever is a state of panic brought on by an intense hunting situation, followed by a huge adrenaline surge. It’s basically your body’s fight-or-flight reaction. If you’ve never experienced buck fever, then you either haven’t seen a 200-inch buck up close or you’re just one cool customer.

For the rest of us, buck fever is a very real and formidable foe. It still haunts me today! When that long-awaited moment of truth comes, when that giant buck finally steps into the open, I feel like a little kid trembling in my boots. This intense excitement is why I love bowhunting so much. Unfortunately it’s also the reason I still miss shots on big bucks.

On my second archery hunt back in the nineties, I had a true monsterbuck step out broadside at 35 yards. Sure enough I came completely unglued and proceeded to send my arrow into the dirt at his feet.

Today’s bows are consistent tack drivers. Unfortunately we let ourselves get in it the way of their performance. The ultimate goal in archery is to eliminate yourself as a variable, and the best way to do that is through diligent practice.

How to Practice for Buck Fever

  • The most effective way I’ve found to practice for buck fever is by getting your heart rate up during practice sessions. You can do this by sprinting to and from your target. Start by shooting one arrow and then sprint to the target, pull the arrow, and sprint back. Shoot again and repeat. This will quickly get you’re your heart rate and breathing up. Do this exercise repeatedly until you are a huffing, puffing wreck. I’ll admit, this kind of practice isn’t very fun, but it’s the best way to prepare for buck fever.
  • Shooting competitively is another way to practice for buck fever. Every major city in the country has archery clubs and regular competitions. Shooting competitively and publicly puts the pressure on and ups the excitement level, especially when competing for money and prizes. Just like other adverse conditions practice, learning to shoot well under pressure is a valuable skill.
  • While hunting there are a few ways to cope with buck fever. First, try to slow your breathing. If you have time before the shot, take a few deep breaths and exhale slowly. Second, avoid getting tunnel vision. Tunnel vision is basically where you lose situational awareness because you’re hyper-focused on one thing, like the deer’s incredible rack. Instead, take a second to expand your view. Look around for any other deer that you might have missed. Whatever you do, don’t rush the shot. Most bowhunting scenarios play out slowly, and rushing things just causes mistakes.
  • When the shot finally comes together, put all your focus into following through. Hunters under pressure usually miss low because they “drop the bow” on the shot. Instead, focus on keeping your sight pin on target until the arrow hits. Keeping equal palm pressure across the bow’s grip also helps with follow through.
  • One more tip:  When a buck suddenly appears at close range, it’s common to misjudge the buck’s size amidst all the excitement. This can lead to shooting a buck you aren’t happy with. For this reason I refuse to pull an arrow until I’ve judged the buck and I’m sure he’s a shooter. Pulling an arrow creates momentum, and when you combine momentum with excitement it leads to smaller bucks, or worse, missing the big one.

Conclusion

These are the best methods I’ve found to practice and prepare for buck fever situations. Buck fever might be an incurable affliction, but it also means you’re passionate about hunting, and that’s a good thing.

Good luck out there!

Extending Your Effective Range

Extending Your Effective Range with Compound Bows

Let’s say you’ve mastered the fundamentals of archery, but you’re stuck with an effective shooting range of 50 yards. Any farther and you begin to miss the 9-inch bullseye. At this point, how do you extend your range?

Extending your effective range starts with shooting a flatter arrow trajectory (reducing the arc of the arrow). There are only three ways to do this.

#1.  Increase Draw Weight

First, you need to transfer more energy to your arrow by increasing your bow’s draw weight. Assuming your bow isn’t maxed out already, you can increase draw weight by simply tightening down the limb bolts. Depending on your bow, this will increase draw weight by 3-4 pounds per full turn. Just be sure to tighten both limb bolts equally or it will mess up your tuning.

#2.  Reduce Arrow Weight

The second way to flatten arrow trajectory is by reduce your arrow weight. This should only be considered if your arrows are already overweight for the game you’re hunting. For example, you wouldn’t want to go below 400 grains (total arrow weight) for deer, or 450 grains for elk. If you’re strictly a target shooter, then you can go as light as you want. However, going too light can be hard on your bow because not enough energy is transferred to the arrow.

Now, the only way to reduce arrow weight is by using lighter points, lighter fletchings, and/or shortening your arrows. In most cases it would be best to start with a brand new set arrows from your preferred manufacturer. Look for an arrow with a low GPI (grains per inch). Lighter arrows are generally rated around 8.0 GPI or less.

#3.  Super Tune Your Bow

The third way to flatten arrow trajectory is by super-tuning your bow. Tuning improves arrow flight by removing slight deviations  in your setup, resulting in more efficient arrow flight. The longer it takes for an arrow to straighten out in flight, the more energy is lost due to air friction. Too much wobble also decreases arrow penetration.

Super-tuning starts with a good paper tuning. This involves adjustments to your arrow rest and/or nocking point. Throughout this process you may need to adjust your bow’s cam timing or cam lean. These adjustments require the use of a bow press, so unless you have the one it would be best left to a professional.

Additional Methods

Aside from flattening your arrow trajectory, there are a few other ways to increase accuracy. They include:

  • Regularly practice shooting at very long distances. This makes shorter distances much easier.
  • Practice “surprise release” drills. This is especially important for people struggling with target panic.
  • Shoot smaller diameter arrows that are more wind resistant.
  • Consider using a one-pin sight. Single pin sights provide better target visibility, especially at longer distances.
  • If you are shooting an older bow, consider upgrading to a newer, faster bow, preferably with two cams. Single-cam bows tend to shoot slower because they don’t transfer as much energy as modern two-cam “speed bows.”

Conclusion

There you have it, everything you need to expand your effective range. With today’s fast-shooting, dual-cam bows you don’t have to sacrifice speed or energy to get a flat-shooting arrow. Just make sure your bow is finely tuned.

When it comes to hunting, shot placement is more critical than speed or kinetic energy. Shot placement means putting the arrow in the precise kill zone for maximum damage.

Above all, make each arrow count during your practice sessions. Always shoot for quality over quantity.

The Secret to Chuck Adams’ Success

Who is Chuck Adams?

Chuck Adams is a living legend in the bowhunting world. Not only was he the first to achieve the Grand Slam of North American big game with a bow, but he also took six world record animals during his career and currently has 211 animals registered with Pope & Young. In his epic book, Grand Slam, Chuck chronicles his decades-long quest to harvest all 27 species of North American big game (now 29 species).

Biography of Chuck Adams, “Life at Full Draw'” by Gregg Gutschow.

Chuck Adams is probably the most prolific outdoor writer in history, having written innumerable articles for major hunting publications spanning four decades. He also wrote a handful of bowhunting books including three editions of Bowhunter’s Digest. In its time, Bowhunter’s Digest served as a comprehensive guide to bowhunting tactics and equipment.

Like so many other hunters from my generation, I’ve been reading Chuck’s articles since I was a teen. I’ve probably learned more about bowhunting from Chuck (may I call you Chuck?) than anyone else.

Recently I re-read Grand Slam, only this time I took careful notes in hopes of uncovering his secret to success. The following points are what I consider to be Chuck Adams’ top secrets to bowhunting success.

The Secrets of Chuck Adams’ Success

  1. Persistence. In a recent podcast Chuck was asked what his top tip for bowhunters would be. He responded, “Persistence …. It’s gonna go wrong most of the time … don’t give up.” Whether it takes multiple trips or multiple years, Chuck does whatever it takes to get his trophy.
  2. Personality. Chuck has what I call a “trophy hunter personality.” He has structured his entire life around bowhunting. Every decision he makes–no matter how insignificant–is made with consideration to how it will affect bowhunting. He even went so far as to forego having children. Most people can’t or won’t do these things. Also, being in the hunting industry full-time, Chuck has a vast network of outfitters and friends in the business who share information and support his goals.
  3. Time and Money. This goes hand in hand with his trophy personality. Basically Adams carved out a successful niche in the hunting industry as a freelance writer. In doing so, he is able to make his own schedule while earning enough money to afford his hunts, which in turn supports his career. That’s a rare feat. For the rest of us, we have to figure out how to earn enough money and free up work and family schedules for bowhunting. Chuck’s hunts average 14 days long, and many hunts—like sheep–require expensive guide fees and licenses.
  4. Extremely Tight Equipment Standards. Throughout his career, Chuck has maintained extremely tight standards for his bows, arrows, broadheads and other archery equipment. He upgraded his compound bow often as technology advanced. He constantly tests his equipment and won’t allow any arrow into his quiver that doesn’t spin perfectly. Chuck uses a rangefinder diligently, he sharpens his broadheads by hand, and he uses heavy-draw bows for maximum arrow penetration. This dedication drastically reduces variables and increases success rates.
  5. Physically Tough. Chuck doesn’t go into a lot of detail about his workout routine, but he does maintained peak physical fitness. At least in his younger days, there was nowhere he couldn’t go. Even his guides were surprised to see him keep up while toting a heavy load on his back. Successful bowhunters like Chuck do whatever it takes to get to the animals, no matter how rough the country or weather conditions.
  6. Hunting Alone. Like most successful hunters, Chuck is a lone wolf. Even on hunts that require a guide—in places like Canada and Alaska—Chuck leaves his guide behind for the final stalk. Chuck is a very personable guy and frequently shares a camp with good friends. But in the field he prefers to be alone.
  7. A Naturalist. It is evident from his writings that Chuck is as much a naturalist as a bowhunter. He is fascinated by the animals he hunts and learns as much as he can about their habits and behavior. Having a thorough understanding of his prey allows Chuck to close the distance on every big game species.
  8. Luck and Timing. Chuck readily admits that that many of his world record animals were taken by luck:  basically being in the right place at the right time. Certainly luck plays a role in bowhunting, but you still have to be out there putting the time in. You also need to draw a decent tag for a unit that’s capable of producing trophy animals. Chuck puts himself in the right place at the right time and that’s how he gets so lucky. Timing has played another role in Chuck’s life. The bulk of his hunting career took place in the 70s, 80s, and 90s when there were more animals and greater opportunity.

Conclusion

Even today Chuck Adams continues to be an icon and voice for bowhunting. Great hunters need great mentors and Chuck Adams is probably the best bowhunter out there.

Aside from the eight items listed above, you’ll find a wealth of information and entertainment in his books. My favorites are Super Slam and Life at Full Draw.

To learn more from a living legend, visit Chuck’s website: https://www.chuckadamsarchery.com.

Shooting for Longevity in Archery: Protecting Your Shoulder

Archery and Shoulder Injuries

You’ve probably noticed by now that shooting a high-poundage hunting bow is a very strenuous physical activity. When you’re young, shooting a seventy pound bow is no problem. But like any physical sport, it will catch up to you someday.

I’ve met a lot of older hunters who were forced to give up archery due to shoulder injuries, or just a worn out shoulder. This usually occurs in one’s late 40s or 50s. Personally, I can’t think of anything worse than putting the bow down forever! In this article we’re going to explore ways to bowhunt into old age.

Shoulder Impingements

After fifteen years of continuous shooting, I began noticing some stiffness and soreness in my right (draw) shoulder. Fearing the worst, I went to a shoulder specialist and was diagnosed with a “shoulder impingement.” An impingement—sometimes referred to as swimmer’s shoulder—is a condition that causes pain due to a tendon rubbing against the shoulder blade.

Similar to tendonitis, shoulder impingements are caused by excessive strain on tendons over time. The pain is consistent and generally gets worse when a person reaches upwards or moves their arms above their head. Over time the shoulder becomes too painful and/or weak to do even modest work, like pulling a bow back.

Fortunately I didn’t have any tears (or worse) that would require surgery, just a persistent discomfort that worsened with physical strain, particularly after shooting my bow. To sum it up, I was put through several weeks of physical therapy and gradually noticed some improvement.

Reducing Physical Strain in Archery

Ten years later I’m still living with intermittent soreness, but now I’m shooting for longevity. I plan to bowhunt well into my seventies, God willing. I’ve taken several steps to reduce further damage while still shooting on a semi-regular basis. Here’s how.

Reduce Draw Weight

Reducing your draw weight is the first step to saving your shoulder. Unless you’ve already suffered a serious shoulder injury, I don’t recommend going overboard. Reducing draw weight will also affect arrow speed, pin spacing and penetration. I would start with 5-10 pounds.

I reduced my bow’s draw weight from seventy to sixty pounds. This was the lowest I dared go and still retain good accuracy and arrow energy. What I’ve learned since then is that shot placement is far more important than kinetic energy and penetration.

Use a Low-Poundage Bow in the Off-Season

Serious archers shoot year-round in order to maintain good form and fundamentals. If this is you, then consider buying a low-poundage bow. Go as light as you want since you’re only using this bow in practice. You’ll also need some lighter arrows to go with it, especially if you’re shooting in competitions.

For off-season practice I switch to a 45-pound bow that’s set up very similar to my hunting bow. This allows me to shoot year-round without wrecking my shoulder. Serious archers shoot hundreds of shots in practice, but only a couple during the actual hunt. So  a low-poundage practice bow is a great way to save your shoulder.

Reduce Shooting Time

Here’s a simple fix: Shoot less. Now that I’m shooting for longevity, I’ve reduced my practice sessions to an hour or less. During these brief sessions I make every arrow count. It’s a simple concept: quality over quantity.

Before hunting season, I’ll take my hunting bow out for fine tuning. Since I’m limited on shooting time, the tuning process can take a couple days, but at least I’ll still be able to hunt ten years from now.

Draw with a High Elbow

One last tip for saving your shoulder. Never draw with your draw elbow pointing down. Instead, draw with your elbow pointing out level to the ground or just higher than that.

You should always draw the bow with your back, not your arms. Drawing with a low elbow engages more of your arms which puts more strain on your shoulder. A high-elbow engages more of your back muscles like it should.

At-Home Physical Therapy for Impingements

If you’re already suffering from shoulder impingements or other discomfort, you might consider some at-home physical therapy.

There are multiple targeted exercises for shoulder injuries like impingements. These exercises are commonly known as “Jobe’s Shoulder Exercises” and can be found with a quick internet search.

These exercises work by strengthening the multitude of muscles and tendons that support the shoulder. This takes the strain off the affected tendon area. Depending on your level of impingement, these exercises should be repeated 2-3 times per week.

Conclusion

For many of us, bowhunting isn’t just a fun hobby, but a way of life.  Simply dropping archery because of a shoulder injury is not an option. So it just makes sense to adopt some level of protection before it’s too late.

Quality over quantity is the name of the game here: make every arrow count. Your long term goal should be to shoot less and shoot lighter. Shot placement is far more important than kinetic energy, so going lighter won’t be a problem as long as you can shoot accurately.

Squirrels: The Bowhunter’s Nemesis

A Real Threat to Bowhunters

I’ll never forget. Ten years ago I rounded a large fir tree and spotted a 180-class buck bedded in some deadfall at thirty yards and facing directly away from me. But before I could even pull an arrow, a nearby squirrel lit up with a world-class barking fit. The buck instantly stood up and walked into the deep woods without offering a shot. Since then, I’ve had innumerable stalks thwarted by these cursed tree rats, some ending entire seasons in failure by a single squirrel.

Aside from using other deer as sentinels, big bucks use a myriad of other forest creatures for safety too. As you travel through the woods you might notice that squirrels, chipmunks, and a variety of birds are continually announcing your presence. They do this to warn their own species of danger, but the deer pick up on their calls and use them to their advantage. Big bucks, especially, are completely aware of their surrounding and pick notice anything out of the ordinary.

How Deer Use Squirrels

If you’ve had the chance to observe many deer in the deep woods, then you’ve probably noticed that every time a squirrel fires up, the deer will stop whatever he’s doing and stare in that direction. Squirrels don’t bark randomly; there’s always a threat, even if it’s just another squirrel in their territory. Either way, if you agitate a squirrel, then just know that any deer within earshot is now looking for danger. Conversely, squirrels bark at deer as well as people. Several times I’ve found deer in places where I’ve heard a squirrel fire up. So don’t be afraid to investigate random squirrel barks.

Like elk, big bucks enjoy the security of bedding in thick, over-grown conifer forests. The problem with conifers is the abundance of squirrels and chipmunks that inhabit them. Like most animals, squirrels are territorial. Long ago I noticed that the whole conifer forest is gridded in squirrel territory. When you leave one barking squirrel behind, you’ll likely run into another and another as you move through the woods.

Squirrels aren’t too noisy early season, but it gets progressively worse in September as the squirrels begin to amass food stores (pinecones) for winter. In my neck of the woods, August 25th is the beginning of mayhem.

Chipmunks Too?!

If you have an abundance of chipmunks in your area, you might notice they’re equally bad, erupting with a myriad of alarming noises that deer pick up on. One time I stumbled upon a crabby 4×4 buck feeding off a trail at 15 yards. Immediately, a cantankerous chipmunk situated between us erupted into a machine gun-like, high-pitched chirping fit. The buck stopped feeding and spent the next five minutes scanning the woods for danger. Eventually he marched nervously away. Just last year my eight-hour, once-in-a-lifetime mountain goat stalk was nearly blown by a single chipmunk who threw an alarming fit in a nearby tree.

Knowing that squirrels and chipmunks are such threats to bowhunting success, what do you do? I’ve tried everything, but here are a few tried-and-true techniques that might help you.

Squirrel Avoidance Techniques

Unless you are sitting in a fixed ambush position, your best strategy is to just get up and move. Once out of sight, squirrels will soon shut up and go about their business. Fortunately, not all squirrels are bad. Some will even allow your presence, like if they’re too busy gathering pinecones to notice you.

A second option is to wait the squirrel out. Squirrels will generally bark for 30 minutes or less, during which time no deer will enter the area, guaranteed. After 30 minutes squirrels will tire out and go back to their business. Another effective technique is to walk directly towards the squirrel’s tree. Most squirrels will get nervous as you approach and shut up—but not always. Some just get louder! Fortunately chipmunks are more skittish and scare easily.

As a last resort, feel free to shoot the wretched beast. You don’t necessarily have to kill him, just whiz an arrow past his head. When he realizes he’s in danger, he’ll likely run off. For this reason, I always carry a cheap, aluminum “squirrel arrow” in my quiver—because you’re not likely to get your arrow back; believe me, I’ve shot at a lot of squirrels. My Spanish name is actually Squirlero! Okay, it’s not, but it should be.

Again, it depends on the squirrel you’re shooting at. Some just climb higher and bark louder. For this reason, a more lethal method might be in order. I know one hunter who carries a lightweight BB pistol in his pack…just in case.

Conclusion

If you hunt long enough, you’ll inevitably have an entire hunt go down the toilet thanks to a random tree rat. So be prepared by using the aforementioned squirrel-avoidance techniques. On a side note, I’ve actually eaten more squirrels than the average person. It was a long time ago, but eat them I did. They’re actually quite tasty; like chicken but with a nutty overtone. Bon appétit!

How to Estimate Distance without a Rangefinder

How to Judge Distance without a Rangefinder

To Range or Not to Range

A laser rangefinder is an absolute necessity for compound bow shooters. Whenever possible I implore you to range the distance of any animal. This is especially important over flat ground and long distances.

That being said, all bowhunters must learn to judge distance without the aid of a rangefinder. When hunting in heavy timber, bucks can appear and disappear quickly, so you need to be ready for fast action. The majority of my trophies were taken on the fly with no time to range. Learning to judge distance without a rangefinder is something that can be easily practiced at home. Here are some techniques.

Practice Makes Perfect

Set your target in the weeds at an unknown distance, and then shoot from random yardages without ranging. After your first shot, verify the distance with your rangefinder. Do this exercise at every practice session and your distance-judging abilities will increase rapidly.

When you’re hunting in the woods you can take advantage of the vast amount of downtime by guessing random yardages of distant trees or rocks, and then verifying the distance with your rangefinder. This is both a fun and productive way to kill time afield.

Another exercise is to figure out the farthest distance you can throw a fist-size rock (it’s usually 40-50 yards). In the field, ask yourself if you could hit a certain object with a rock. Your brain already knows, through muscle memory, how far you can throw a rock, so you can pretty much gauge whether or not you could hit something with a rock by just looking at it. Then use that estimation as a reference. This method is surprisingly accurate.

Judging distance can be especially difficult over longer distances and flat ground. In these situations try using the twenty-yard addition method. You already know what 20 yards looks like, so you can figure out longer distances by finding a spot 20 yards away, and then another spot 20 yards beyond that until you reach your target. Keep adding 20-yards until you reach the target. It works!

Bowhunting Top 10 Tips for 2021

Bowhunting Top Ten Tips for 2021

In reviewing notes for my last 25 years of bowhunting, I decided to compile a list of my ten tips for bowhunting success.

  1. Hunt where the deer are, not where you want them to be. Use the off-season to study, scout, and explore promising new areas. Always have multiple areas for opportunities.
  2. Be a wilderness athlete. At the very least maximize your physical fitness—especially cardio—so you can actually make it to where the deer are. Minimize your body weight and field gear so you can go farther and  move with stealth.
  3. Learn everything about your prey. Study books, videos, and actual deer behavior. Become obsessed with the daily lives of deer, not just hunting.
  4. Avoid people at all costs (it gets harder every year). Deer hate people more than anything! As a rule, you need to put as much energy into avoiding people as you do hunting. Nothing good ever lasts, and eventually you will lose your secret spot to the crowds. So be adaptable and mobile, ready to cut your losses and find a new area at any time.
  5. Maximize time afield. Hunting is equal parts skill, luck, and time. The longer you hunt, the higher your chance of finding or lucking into a big buck. Spending a more time afield is the only way to attain the experience you’ll need to hone your hunting skills.
  6. Scout effectively. Whenever possible, locate your target buck before the season starts. Off-season scouting begins the day your hunt ends.
  7. Get as close as possible, and then let things play out naturally. Rarely can you force the situation with big bucks. They are extremely wary and fragile. Hunt them on their turf and on their schedule. Success is simply the result of many good decisions plus time and luck.
  8. Flawless shot execution. Shooting your bow must be effortless and subconscious. If you can’t shoot straight under pressure then nothing you’ve done up to this point matters.
  9. Hunt alone. The ultimate goal in bowhunting is not to even exist., to become invisible to the deer. Hunting alone reduces your scent, sound, and visibility. More importantly it allows you to focus on your instincts and innate skills rather than hunting by committee.
  10. Be eternally open-minded and humble. Great hunters learn something new every single day they spend afield. The moment you become an “expert” is the moment you stop learning.

I hope you enjoyed my tips. Did I miss anything?

Always Pull Another Arrow


Always Pull Another Arrow

This is one little–but all-too-important–hunting skill that bow hunters should be practicing. It might seem intuitive that, immediately after your first shot, you should be pulling and loading another arrow. But it’s not.

The wait-and-see approach can make all the difference between success and failure. This is why you hear guides on hunting shows always pleading, “Shoot again, shoot again!”

Bow hunting is different than gun hunting insomuch that the animal often doesn’t realize you’ve shot, especially at longer distance where he doesn’t hear the shot. Sometimes the animal doesn’t even know he’s been hit, which can afford you a follow up shot!

Hit or miss, your non-bow hand should be immediately grasping and loading another arrow. It’s one of those skills that’s acquired over time through real-life hunting experiences, but rarely practiced.

Now, I don’t want to pick on my wonderful bowhunting wife, but here’s a classic example:

On our first archery turkey hunt, we called up a group of mature toms. Forever they gobbled while cautiously circling us, so we moved in on them. When the biggest tom broke the treeline, I whispered the yardage and Esther let an arrow fly…and missed. The tom jumped, then meandered off. Desperately I whispered, “Shoot, SHOOT!”, but when I turned around, I saw that Esther hadn’t loaded another arrow. What seemed intuitive to me was not intuitive to a newbie-hunter.

Practice Makes Perfect

To avoid this mistake I recommend incorporating a simple shoot-and-pull technique into your regular practice routine. Note: It’s best to use a real-life 3D animal target to help train your brain for real-life scenarios. Here’s how it’s done:

  1. Shoot your first arrow. Hit or miss, you have five seconds to…
  2. Pull, load, and shoot a second arrow.
  3. Repeat.

Pretty simple, huh? Given enough time afield, I guarantee that practicing this technique will one day save your hunt. Hit or miss, having a second arrow ready can make all the difference between success and failure.