The Good, the Bad, and the Beautiful
Same Goal, Different Year
Now in my 29th year of bowhunting mule deer, the annual ritual remains the one thing I look forward to every year. I suppose it’s a combination of high mountain adventure and escapism, but mostly I love the extreme challenge of chasing tough, cagey animals through extreme terrain with my bow and arrow. And if I’m successful, it provides the meat that sustains my life all year long.
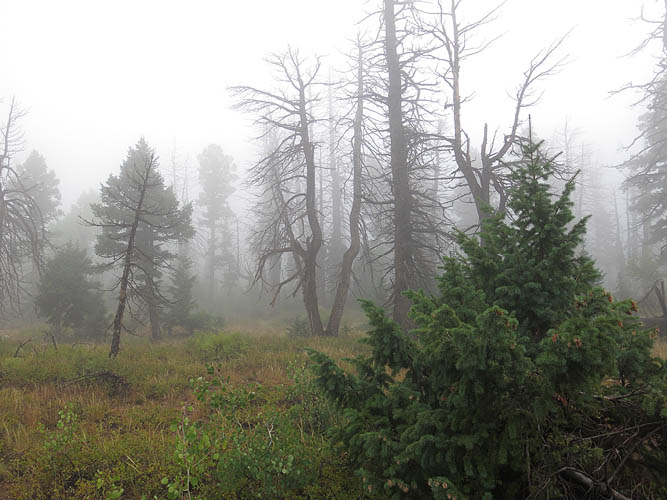
What I don’t love is a sport that degrades with each passing year. I don’t want to complain here—especially about hunting—but the diminishing quality of the modern hunt has become the overriding theme of my hunting experience. The once magical woods that brought me so much joy over the years—even rescuing me from my darkest times…well, it’s changed.
Primarily, there are far less deer now, and far fewer great bucks. There are many reasons for the mule deer’s decline, but it’s mostly the result of human encroachment coupled with gross mismanagement by the state game department. Of particular note, the public land where I hunt is becoming so overrun with recreationalists—not just other hunters—that most big bucks don’t even bother leaving private land.
A big buck learns quickly to equate people with danger, and whenever he wanders onto public land and encounters a person, he flees back to the relative safety of private land. Worse yet, he usually won’t come back for the rest of the season. This has become the toughest challenge.
Still, my goal remains the same: To harvest a monstrous 200” buck with my bow and arrow. It’s really an unrealistic goal; in fact I haven’t seen a 200” deer in many years. However, the unit I hunt borders the infamous Paunsagunt premium deer unit, so genetically it has trophy potential.
Unfortunately, very few public land bucks live long enough to reach maturity thanks to poor management by the Division of Wildlife Resources (DWR) whose primary goal is maximizing revenue by issuing excessive permits for a deer population that hangs on by a thread.
Despite all of this, my love for the hunt doesn’t change even if the quality does. Nor does it stop me from devoting an entire month to my beloved endeavor…
That is, unless I don’t draw a tag. For the first time in my life I didn’t draw an archery deer tag in 2024. I was nearly traumatized. However, that meant I would be guaranteed a tag in 2025.
What could possibly go wrong?
Stroke
In January, Esther—my wife and hunting partner—had a major stroke. Long story short, I found her paralyzed on her right side and unable to speak. We spent most of January in the hospital trying to recover.

During the extended stay, I spent much time reading and learning about stroke recovery. What really got my attention was the brain’s incredible ability to heal itself by creating new neuro pathways around damaged areas through a process called neuroplasticity. It’s not as easy as it sounds.
The human brain demands an inordinate amount of energy and focus to do simple tasks, like eating, walking, talking, etc. Humans spend their formative years programming these simple motor skills to memory, after which we just take it for granted. A stroke forces you to start over.
Esther’s recovery was slow and steady. She would fall into exhaustion and despair on a near-daily basis, but the goal of getting back to the mountains remained steadfast, and we fought onward.
Turning tragedy into action, I brought a youth bow to Esther’s hospital room where she spent weeks relearning the basics of archery, as well as walking and talking. With the bow hunt just seven months away, returning to the steep mountains seemed like an impossible goal.
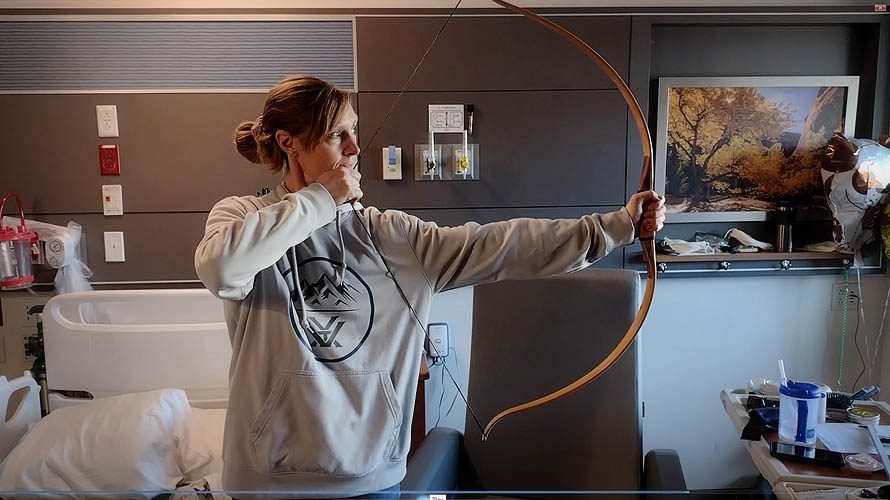
Upon returning home, Esther continued to recover while I struggled to stay caught up with work. Summer came and we went hiking often. Esther stumbled and fell through the woods, but eventually prevailed and no longer needed a leg brace. She worked daily to pull her 60-pound hunting bow back, and could even shoot a few wobbly arrows before collapsing.
And before we knew it, the hunt was on.
Not My Woods
Butterflies tickled my stomach as we set up camp ahead of the hunt opener. We made it! I had a tag and some hope, and that’s all I needed.
As with past years I picked up where I left off. But right away I could tell things were different. Days ticked by as I moved from area to area searching for big bucks and tracks, but with no luck. The likely culprit was the severe drought. It hadn’t rained in months and the woods were sickly dry with minimal forage and water. Such conditions tend to suppress deer movement and confine them to tiny home ranges near water.
Big brother Brent was hunting a few miles away in a secret area he calls “The Ribbon.” We would meet up for lunch every once in a while to compare notes and commiserate about the lousy hunting conditions. Joking about our growing “forlornness” was common.
We both went into the hunt with visions of 200-inch bucks, but neither of us had seen anything over 160. Worse yet was the realization that, according to our personal statistics, we were only averaging one shot opportunity per 28-day season. This lied in stark contrast to three decades ago when you’d regularly shoot every arrow out of your quiver in a single weekend. In the end all we could do was put in the time and wait for conditions to change. Man, we really needed some rain!
After waking and hiking at 5am every day, it was nice to spend the long, hot, midday hours resting back at camp. But it was far from relaxing. The sun beat down from cloudless skies, turning the tent into an oven and making napping miserable. Worse yet, there was a crazy band of perma-campers nearby who spent all day getting high and yelling obscenities, or blaring rave music from the car stereo. This continued throughout the entire hunt!
I don’t understand the people who’ve taken over my woods. On one particular night someone fired a high-powered rifle over our camp at 2 a.m., likely elk hunters trying to run us out of their “secret” area. They’d done this before, so it wasn’t a surprise this time. Still, I never feel so much hate as when I’m doing what I love the most.
Esther had her own struggles. She spent most of the time exploring our old, traditional haunts that still held an occasional deer. However, stalking quietly and shooting accurately eluded her due to residual effects from her stroke.
On one occasion I accompanied her as she stalked after a group of three mature bucks feeding unawares. She got close and drew her bow a couple times, but didn’t have a clear shot. When a buck finally stepped into the open, she tried to draw again but couldn’t get the string back. In a panic I grabbed her arm and pulled it to full draw. But then she was too shaky and missed the deer widely.
At that point I realized I couldn’t help her. I couldn’t be there every moment to pull on her elbow. The best thing I could do was offer some advice. Here’s what I told her:
“There was a great karate master who could chop through thick boards with seemingly little effort. His students were perplexed by his skill. Try as they might, their boards stood strong against their strikes, leaving their hands bruise and broken. The master finally explained: “Don’t focus on the board. See your hand already through the board, and put it there.”
That was the secret: To see past the obstacle.
I continued, “Don’t focus on the draw; focus on the deer. Visualize the bow already drawn. You’re stronger than you think.” And with that we parted ways; I hunted my woods and she hunted hers.
Two weeks into the hunt, the mountain suddenly cooled off with relentless monsoonal rains. The woods mysteriously cracked and popped all day and night—something I’d never experienced before. I figured it was the sound of parched timber rehydrating and expanding at a rapid rate.
I was much more hopeful with the cool-off. Between storms I slogged along, sometimes with a big golf umbrella in hand, hoping to catch new deer coming up from the vast private lands below.
The Desert
One day I was sitting in my truck waiting out a storm when I got a call from a local about some taxidermy work he needed done. When I told him I was hunting, he got excited and told me about some large bucks he’d see in the low desert country near the Arizona border. Needless to say I was elated to learn this, and immediately drove to the desert alone.
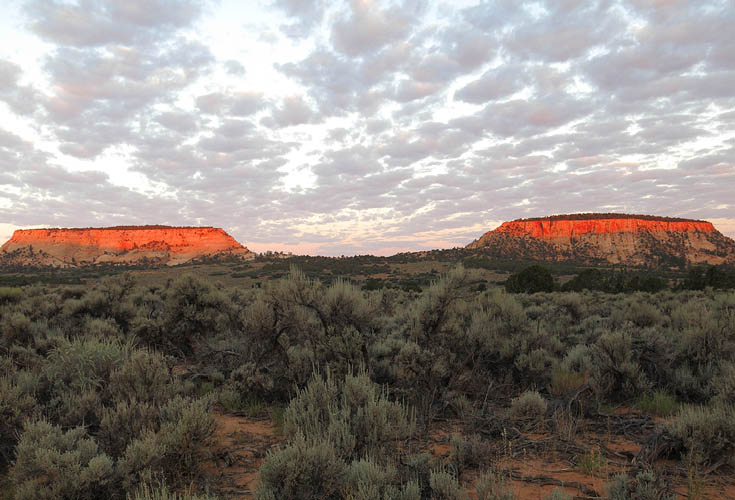
Long story short, I spent two days in the sandy, hot desert. I found the area he described alright, but glassing didn’t turn up any deer and tracking was nearly impossible in the sand. Unlike the high mountains, the desert was hot and dry.
Knowing that nothing could survive there without water, I set out the second day in search of water. I hiked all day, carefully inspecting every possible water source on the map, but there was no water anywhere. By mid-afternoon I realized I’d pushed too hard and was running dangerously low on water myself.
To make matters worse, I got cliffed out while hiking a long plateau back to the truck. There was no safe descent, so I had to backtrack several miles in the afternoon heat. At one point I considered holing up in the shade and traveling at night when it was cooler, but I was already perilously dehydrated.
I pushed ahead at a steady clip and by some miracle arrived at the truck just before dark, drenched in sweat and dust. In disgust I threw camp into the truck and headed back to high country. Better to fail in my cool mountains, I figured, than suffer the horrible desert another day.
Changes
Upon returning to the soggy, 9000-foot mountains, I decided to reinvent the hunt. I started by hunting exclusively on very steep wooded areas adjacent to private land. The hunt was half over and any areas accessible to humans were devoid of deer.

I saw my first big buck on morning #16 while sneaking through some dense timber. Heavy antlers bobbed as he fed fifty yards downhill from me. I pulled an arrow and waited for a clear shot. While standing there, a doe and fawn came wandering through, threatening to blow up the area. I froze up and they continued on unawares.
The buck was still out of view, but if I could just take a couple steps to my right, I might have a clear shot. I whispered a prayer and took a step. Suddenly the whole area blew up. Apparently a smaller buck had wandered in unseen to my right, and when I moved he snorted and blasted downhill, taking the big buck with him. That’s bowhunting, I guess.
Day #20 had me sneaking through dense timber in the gray light of morning; same mountain, just lower. Movement caught my eye fifty yards below. I froze up at the same time an old warrior buck caught my movement. We stared at each other for a good long minute before he got nervous and disappeared into the trees. I pulled an arrow just in case. Sure enough he walked right into my scent stream, and then spun around and bounced back into the opening. I was ready and sent an arrow whistling his way. In a split second he jumped out of the arrow’s path and smashed down the mountain to private, never to be seen again.
Stroke of Luck
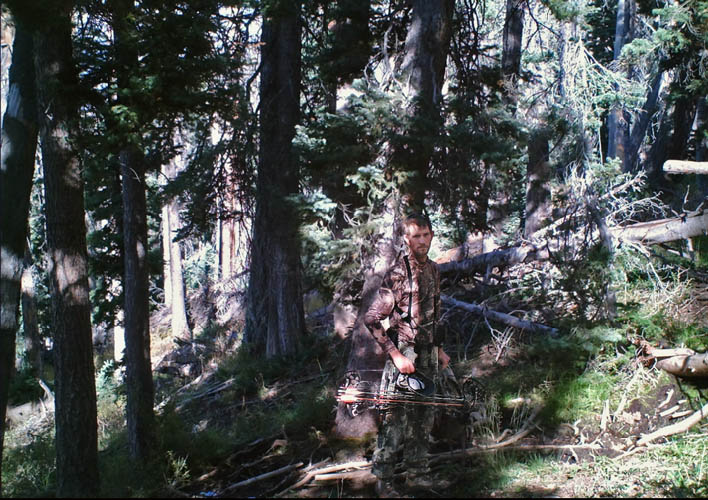
Day #25; only three days left in the hunt. No days off, no more camp breaks; just full days afield, sneaking through tangled timber alone; half ninja, half madman. Success or failure hinges on every decision. This is what I work for all year long. One tag, one opportunity, that’s all I ask. Desperate, but grateful, I’m at peace here in the big woods.
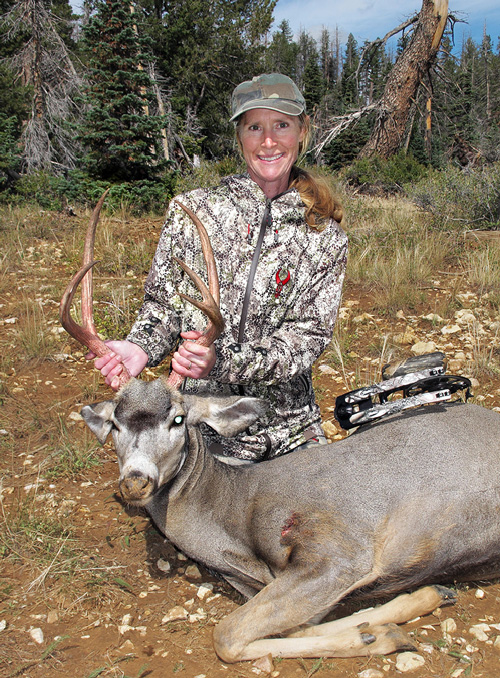
I’d gotten just about as far from the truck and trail as possible when I got a message from Esther. There was a picture of a fine buck lying dead and a text reading “Deer down.” I couldn’t believe it! She had climbed the mountain and took care of business all by herself. For the first time in weeks I sighed with relief. Whatever happens now, the hunt is a success.
It took two hours to power out of the woody hole I’d descended into and get back to my truck. In my haste I ran face to face into a wonderfully wide 4×4 deer, but he was equally surprised and bounded away. No big deal.
Back at the truck, I drove to Esther’s side of the mountain and then scrambled up to find her standing over her deer, all smiles. We took photos, quartered the deer, and loaded it into packs. I almost didn’t notice the crushing weight of the pack as we descended the mountain together.
The next day was a total bow-out…literally. I woke up to gale force winds trying to rip the tent from the ground with me inside. I spent the day afield but saw nothing. Deer don’t move much in high winds because it dulls their survival senses. They just hole up in the thick stuff and wait it out.
Day #27
Day #27 was less windy, and with only two days left it was time to cut my losses. Earlier in the hunt I found a group of average deer living in one of my old haunts. I headed there at first light but found the area completely devoid of deer. With the morning waning on, I scurried over the ridge and dropped down the steep southwest face where I’d busted an unseen buck earlier in the hunt.
While working steadily down the wooded slope, movement caught my eye 20 yards ahead. Only the wind swooshing through the trees had obscured my approach. All I could see was bits and pieces as a wide-antlered buck fed in the direction of a dense bedding area. In slow motion I loaded an arrow and scanned ahead for an opening. If he continued his current trajectory, he’d pass through a little window between fir trees.
My unblinking eyes squinted over my bow, tracking the buck’s every movement as he slowly and cautiously stepped towards the opening. Then things happened fast! He disappeared behind a tree, I drew my bow, and he popped into the opening. Just as I was squeezing the trigger release, the buck began turning to go downhill. Simultaneously I noticed I was holding the wrong sight and in a millisecond dropped the top pin behind his shoulder and released the arrow.
The buck blasted away.
I waited a few minutes then crept over to where he was standing. The ground was torn up, but there was no arrow or blood. Fearing a miss, I followed the dug-in tracks. Suddenly a broken-off arrow covered in blood appeared on the ground. A hit!
I continued on. Rounding some trees, the buck came into view standing 40 yards away and looking back up the mountain. I could tell he was hit hard and eventually he lied down. I knelt down too, loaded an arrow and waited. He kept lifting his head, and then pushed up to a standing position. I was ready but rushed the shot just as he stepped forward behind some cover. My arrow deflected off a branch and the buck hopped out of sight.
Not wanting to push the buck down to private, I backed out and made a wide circle below and downwind. That way if he busted, he’d go uphill and remain on public land. Well, I got 100 yards below where I’d taken the second shot and a big buck suddenly jumped up in front of me and bounded down the mountain to private. I was sure it was my buck and was devastated. But as I followed his bounding tracks I noticed there was no blood or indication he was wounded.
Now, standing at the bottom of the mountain I questioned whether it was my buck at all, or perhaps a near-identical one instead. The only option now was to hike back up and follow the original blood trail.
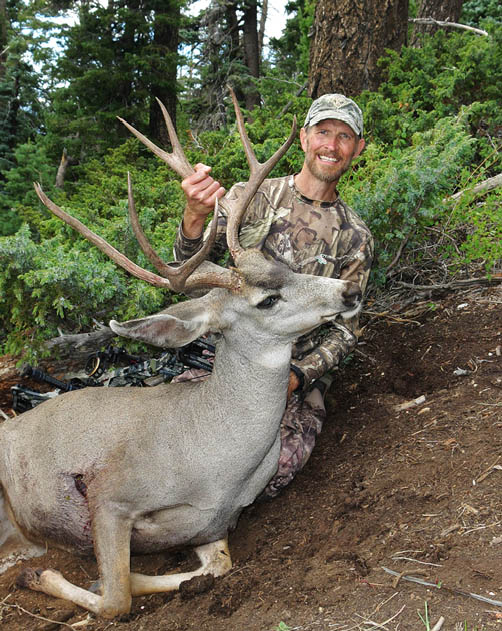
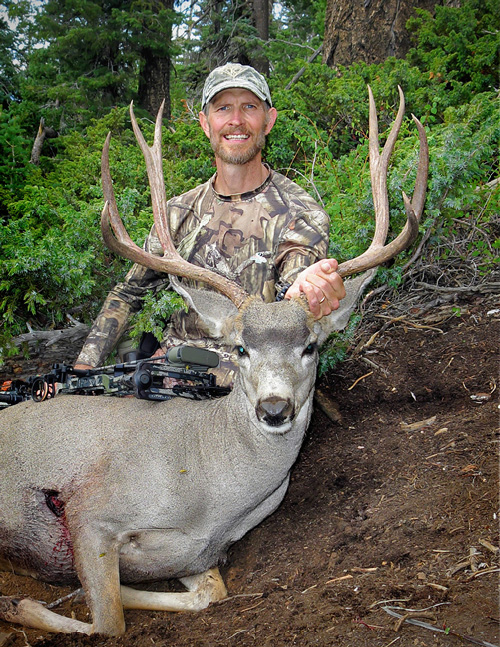
With my legs burning and sweat dripping off my brow, I finally arrived at the original blood trail. I followed the conspicuous trail past the second shot location and side-hilled for about 100 yards. When I looked up again, there he was, laying upside-down in a pile of deadfall branches. What relief! My first shot had been lethal after all.
With all my remaining strength, I wrangled the beautiful 4×4 buck out of the deadfall and dug out a flat spot on which to process the deer. It was a race against midday heat and dehydration to get the deer quartered and hung by myself. Perhaps the best decision I made during the hunt was stashing a water bottle about a quarter mile away on a mountain saddle. It may have saved my life.
The rest of the evening was spent hauling meat back to the truck, just as I had done two days earlier with Esther’s deer. My whole body was hammered, especially my quads from ducking limbs and climbing over deadfall with a heavy pack, but I couldn’t be happier. Somehow, in the final days of a long and difficult hunt, everything came together for both Esther and me.
Conclusion
With all the challenges of modern bowhunting, the quality of the experience certainly has diminished some. Even if you can draw a permit, the few remaining deer continuously adapt to elude us hunters faster than we can keep up with them.
Despite everything, the mountain stands strong against the madness of modern life. What remains is the supreme beauty of nature, the thrill of the hunt, and miraculous success found in the final hours of seemingly impossible hunts.
And there, deep in the shadows of twisted timber, where few men dare go, lies the majestic muley buck, waiting to test every fiber of one’s being.