My Broadhead Search is Over
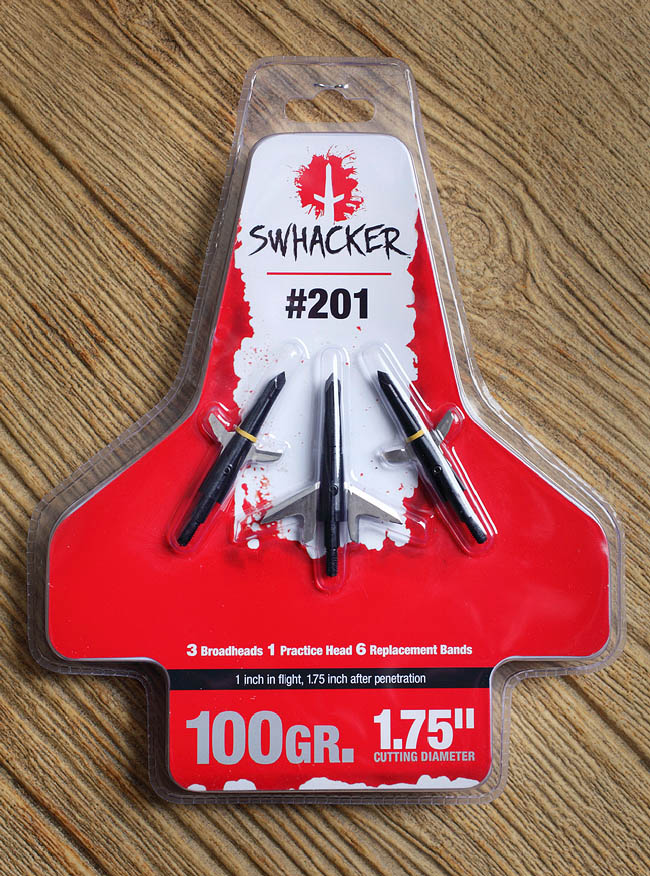
For three decades I’ve been on a quest for the perfect expandable broadhead, and I think I finally found it with the 100-grain Swhacker #201 with a 1.75-inch cut.
Swhacker broadheads have been around for many years, but it wasn’t until I tested them against some industry standards–including Rage, Muzzy, and NAP–that I realized how good they really were. In this test I was looking for maximum penetration, as well as overall toughness; and the Swhacker #201 beat them all.
The secret to their success lies in Swhacker’s unique design, with sharpened wing blades that begin cutting even before the main blades deploy. In this way, they act more like a fixed blade, but with the benefits of mechanicals, and with little kinetic energy lost upon deployment of the main blade.
Why Expandable?
Before moving on, you might be wondering why I choose to shoot expandables over fixed broadheads. Simply put, mechanicals fly truer with less planing, and less exhaustive bow tuning.
Even if your bow is tuned perfectly, a little torque from an awkward body position can throw a fixed blade off target. Worse yet, your bow may go out of tune halfway through a hunt. Expandables are simply more accurate under all hunting conditions.
Broadhead Criteria
Here is a prioritized list of all the attributes I require from my broadheads, expandable or otherwise:
- The broadhead must fly like a field point with no wind drift of planing.
- The blades must be razor sharp and super strong.
- The broadhead must provide maximum penetration, maximum wound channel, and with minimal deflection on quartering shots.
- It must be reliable in flight, and durable in the quiver.
- It must be affordable.
A Closer Look
The Swhacker meets all the above criteria. Let’s break it down further.
Swhackers fly with field-point accuracy. Before the hunt I just unscrew my practice points and screw on the broadhead.

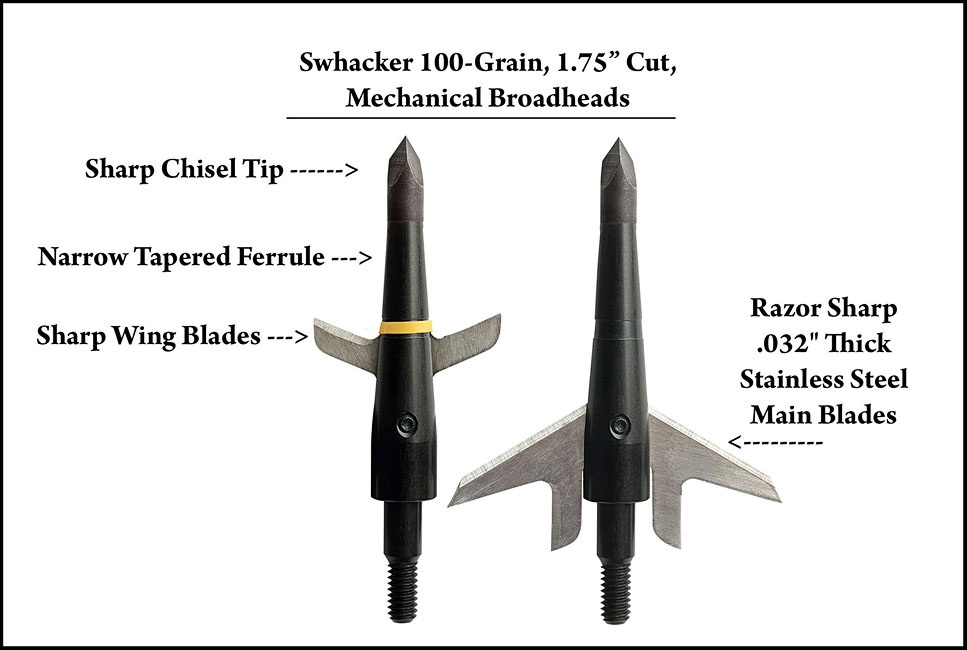
Secondly, the Swhacker has a unique blade design with two separate cutting edges. The first set of edges (wing) blades, are used for cutting the hide and ribs. These blades are also used to open the broadhead, and are much smaller than the main blades. The main blades still have pristine edges when they open in the body cavity and create a widened wound channel.
As for toughness, the Swhacker features stout, .032” blades that resist bending or breaking. During flight the blades are held in place by sturdy, yellow Swhacker bands. These bands hold the blade in place during flight, but open easily upon impact, and with minimal energy loss.
Swhacker broadheads come in three cut sizes: 2.0″, 1.75″, and 1.50″. A wider cut translates to better wound channels; however it creates more drag as it cuts. Thus, you need to match the blade diameter to your draw weight. For example, a 2-inch blade is better for higher-poundage bows (70+), while a narrower, 1.75″ blade works better with lighter draws like my 60-pound Mathews bow.
For bows 50 pounds or less, it’s probably best to stick with fixed blades. Fixed blades cut on impact without robbing the arrow of kinetic energy needed to open mechanical blades.
What about the Ferrule?
The Swhacker broadhead features a narrow, tapered body, or ferrule. Narrow ferrule broadheads penetrate much better than wider ones. Also, the chisel tip nose design reduces deflections on quartering shots.
Where to Buy?
These days, mechanical broadheads with titanium ferrules can range in price up to $100 for a 3-pack. Most of them are over-engineered and/or made with unnecessarily expensive materials like titanium.
Perhaps my favorite feature about the Swhackers is the price: I buy them in bulk on Ebay where they range in price from $12.00 – $18.00 per 3-pack. This is great news because I go through a lot of them!
Interestingly, the Swhackers #201s are sold in two different packaging options (see below). The black packaging is made in China and the red packaging (more common) is made in Taiwan.
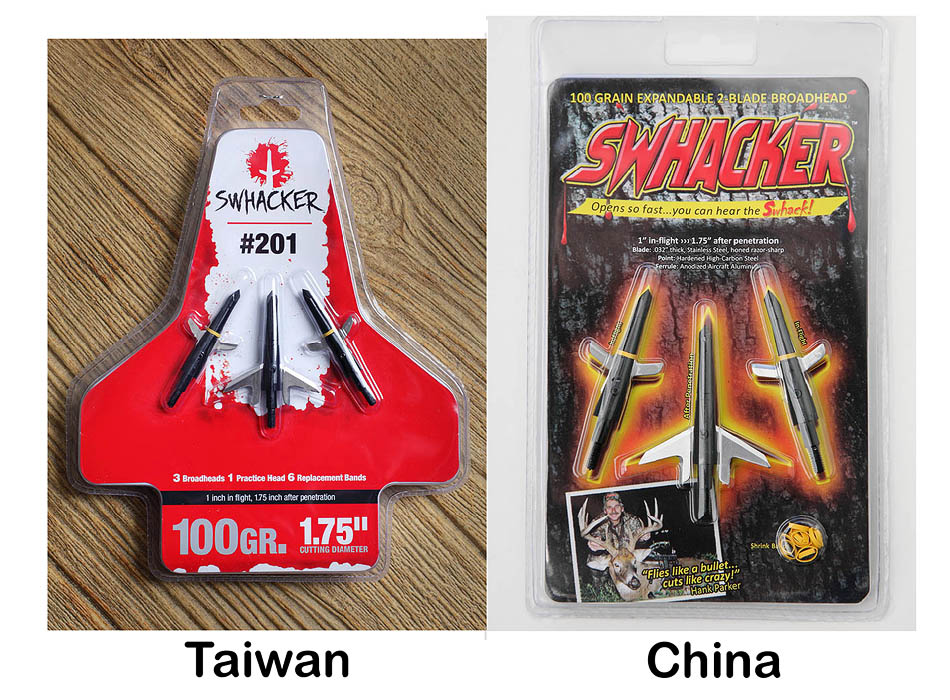
I’ve tested both and they perform equally well. Visually, they are identical. Just note, the Chinese packs are cheaper, but do not include a practice point.
Conclusion
In the age of expensive and confusing hunting gear, it’s nice to have a cheap and reliable broadhead. Swhackers are the most reliable mechanical head I’ve ever used or recommended. What’s your favorite broadhead?