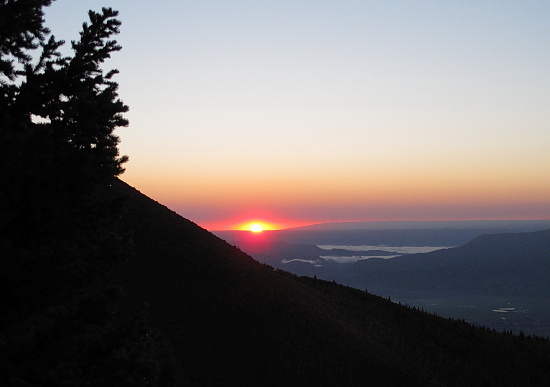
Tag Archives: skills

Be in Position at First Light

Hunt004-NOCAPT

Be in Position at First Light

Since I’m not a morning person, this is my least favorite part of bowhunting, and in August, first light means being in position by 5:30 a.m. Most of my life I’ve elected to still-hunt into position, or more likely, I didn’t have a destination to begin with, choosing instead to start hunting as soon as I left camp. Now I know that there are always primary areas, and everywhere else is secondary.

If you decide to still-hunt into a primary area, most likely you’ll arrive too late, after the animals have already bedded down for the day, thus increasing the likelihood of spooking the deer out. Therefore, I recommend picking an area each day and being there well before first light. There are simply more animals up and moving at first light than any other part of the day, so it just makes sense to be in those high traffic areas—such as between feeding and bedding areas—and then limit your movements when you get there. This is known as “ambush” hunting and is by far the most effective strategy for intercepting big game. Still-hunting—where you slowly cover lots of ground while looking for game—is more effective during midday hours when the deer aren’t moving and it makes sense to go looking for them.

One final note: “Being in position” often means being in a particular area at midday, not just morning. Much of my hunting success has come with the sun more or less overhead. Remaining in the field throughout the entire day—not just morning and evening—simply provides more opportunities. This reminds me of a popular photography quote: “F/8 and be there!” This was famous photojournalist Arthur Fellig’s response to the question of how he managed to get such compelling images on a regular basis. What Fellig meant by “F/8 and be there” was in order to capture a pivotal moment on film, you actually had to be at a certain location at a certain time. In hunting and photography, timing is everything. If you’re napping back at camp at midday, your odds of success are zero. (Incidentally, Fellig’s chosen aperture setting, F/8, was likely an arbitrary number chosen in jest since it’s really a situation-dependant camera setting.)

Hunter Evasion

deer_1

Hunter Evasion Tactics

We could argue all day about what the mule deer’s greatest strength is, whether it’s their superfluous hearing, specialized eyesight, or powerful sense of smell. The fact that they must live in the outdoors year-round under extreme conditions requires them to have many strengths. But in my observation, the mule deer’s greatest strength is evasion.

In most instances, as you go sneaking quietly through the woods, the deer have already sensed your presence and are quietly sneaking away from you. Novice hunters aren’t usually aware of this, and if they don’t see any deer all day, they just assume there aren’t any around. Well, that’s exactly what the deer wants you to think! If every time a deer sensed a hunter, he went flying out of its bed and bounded noisily away, then experienced hunters would know there were deer in the area and continue putting more pressure on them. Instead, smart bucks have learned the art of quiet evasion.

As a rule, you’ll hear a lot more deer bound away than you’ll ever see, and you won’t see or hear even more deer that sneak silently away from you. But if you learn to slow way down and play the wind just right, you’ll eventually get within bow distance of an unsuspecting buck. This still doesn’t guarantee a shot because in most cases the buck will still sense some sort of danger before you can raise your weapon. He’ll suddenly explode from his bed and fly out of sight, carefully keeping as many trees as he can between him and you as he goes. That’s just part of hunting. There’s no way to fool all the deer all the time.

Big bucks have also developed a tactic for avoiding stealthy hunters by “lying low.” Since the deer doesn’t detect the stealthy hunter from a great distance, the sudden appearance of a hunter at close range will force the deer to make a decision: either he can flee out of his bed and alert you to his presence, or he can lie low and let you walk by, hoping you don’t see him. On numerous occasions, I’ve had bucks explode from a bed within just a few yards of me. Obviously the deer knew I was there beforehand, but chose not to flee until danger was imminent.

Since most bucks you encounter evade you one way or another (sometimes even after being shot), then evasion is obviously the mule deer’s greatest strength. The best advice I can give you is this: Never underestimate a mature buck. In most cases, the best you can do is to get in the vicinity and hope things play out in your favor. Be patient and let things unfold slowly, at nature’s pace. Even if it takes all day to stalk a buck you’ve spotted, your best chance of success is just getting close. Once the buck has sensed you, the jig is up and you’ll have to go find another one.

Pre-hunt Meditation

DT2

Pre-Hunt Meditation

Bowhunting success for general archery deer in Utah is about 20%. That’s about double what it was 20 years ago, mostly due to better equipment. Still, the average bowhunter is looking to harvest a deer only once every five years. That’s bleak!

Zenbowhunter.com is dedicated to raising those numbers for people looking to expand their outdoor knowledge and shooting skills.

Bowhunting success hinges upon five factors:

1. Luck: The truth is most big bucks are stumbled upon by chance, not skill. By improving your hunting skills, you also increase your luck.

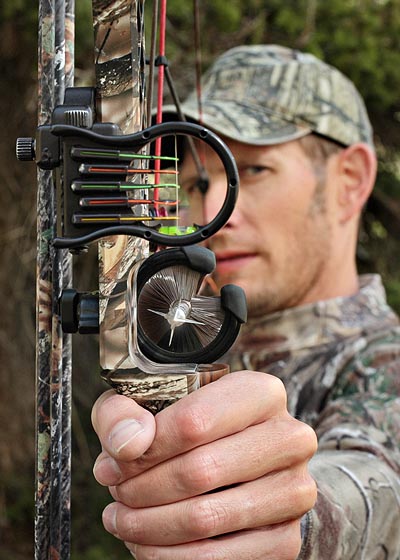
2. Equipment: Having precision weaponry, optics, and gear certainly helps tightens your arrow groupings and reduces the chance of error. But it doesn’t contribute anything to actual hunting technique or woodscraft. These factors come through experience, scouting, and diligent study.

3. Technique: This is the actual hunting part: learning everything about your prey, then locating it, and finally executing a successful stalk. Humans are as much a part of nature as the deer are, so the goal is to reconnect with your natural predatory instincts and use it to your advantage.

4. Information: Learning your area through scouting, studying maps, and collecting data from your state’s wildlife division will help you pin-point deer concentrations, access, and what you can expect from your selected hunt area.

5. Expanding Consciousness through Meditation: I belioeve that this is what separates the consistently successful hunters from the rest. The “great unknown” is what Zen Hunting is all about; aka, turning the unknown into the known. You might call it “advanced hunting techniques” but it’s really just the process falling into the rhythm of nature, collecting data in the form of sign and clues, and following your natural predatory instincts. Zen meditation–whether formal or not–helps you achieve a higher state of awareness by expanding your consciousness.

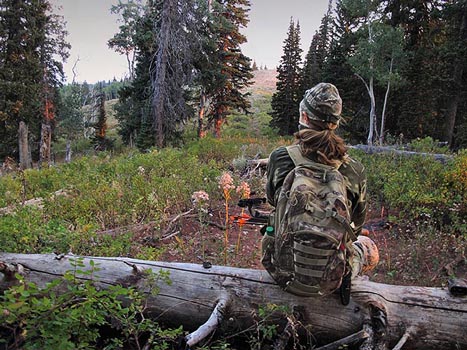
Before entering the woods I begin to fall into a meditative state by focusing my energies on the upcoming hunt. I go about my work and other responsibilities in a seemingly normal way, but my real focus is  on the mountains. Phones ring, people talk, distractions arise, but nothing can assuage my focus.

Pre-hunt mediation can be a lot harder to achieve in this modern era, mainly due to constant distractions. Most people are just too busy and/or too distracted to relax and meditate. Between work, texts, emails, family, and the myriad of other responsibilities, we can’t seem to get in the zone.

Sure, we’re excited about the upcoming hunt, but we don’t really break free from the busy life until we pull out of the driveway and head for the hills. It will then take at least a few days of hard hunting to get into the rhythm of nature. By then, the hunt could be over!

Pre-hunt mediation might sound like a bunch of hippie-hogwash, but it has worked for me for many years. If you’ve stuck with me this far, then you’re in luck. I’m going to share a few techniques for getting into the rhythm of nature:

  • Spend some time in nature alone. Drive to the mountains and take a short hike. Spend some time sitting near water, trees, etc. Just sit and watch and listen. Take some photos. Taking pictures forces you to look for beauty in nature, which in turn helps you  connect with it.
  • Watch hunting videos and read hunting books and magazines. By observing how animals act and react to other hunters, it will help you prepare for similar encounters. It will also get you into the hunting mindset beforehand.
  • Study topo maps of your hunting area. Look at places you’ve had success before, and even places where you’ve failed. What are the differences? Can you find similar places on the map? Mark places where you’ve seen big bucks in the past. Deer are creatures of habit, so chances are there will be more there. Make a skeleton plan of your hunt; where will you be hunting on opening morning, and then where will you go from there?
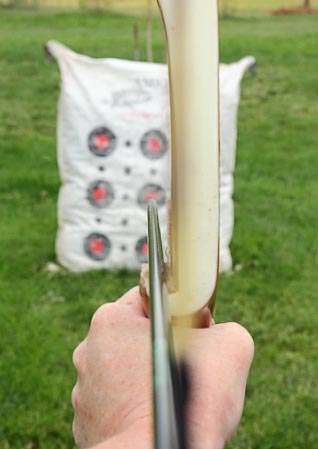
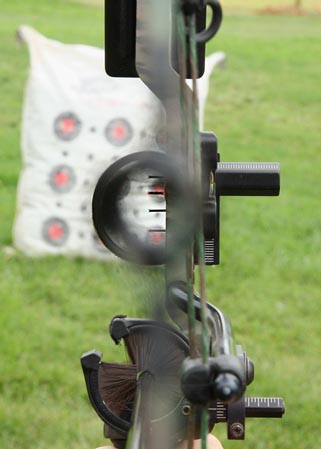
  • Shoot daily. Even if you already shoot regularly, do it differently. Instead of just seeing your same old target, make up scenarios. Before you draw the bow, imagine a deer feeding along. Take a second to let the scenario play out. The deer is behind cover, it steps forward and looks the other way. Now shoot. On the next arrow imagine an elk, a bear, a rabbit, whatever. Just make it more realistic. Brain studies show that the subconscious mind has a hard time distinguishing between reality and make-believe. This exercise will put you into the hunter mindset. Plus it’s fun.

These are just a few of the methods I use to get into the spirit of hunting before I set foot in the woods. Establishing the hunter’s mindset ahead of time will contribute more to success than anything else you do.

The few hunters who have consistent success are the ones who don’t view bowhunting as a hobby or a sport, but a lifestyle. Make that commitment, set a goal, and view hunting a way of life. The numbers say your odds are 1-in-5, but you can beat the odds by putting  in a little extra effort. I truly believe that success in bowhunting is a decision, not luck.

How to Aim Traditional and Compound Bows

IMG_3467

How to Aim Traditional & Compound Bows

In this short article I’m going to explain the proper way to aim both traditional bows and compound bows.

Aiming Traditional Bows

Traditional bows (recurves and longbows) are aimed in the following sequence of steps:

  1. Nock the arrow onto your string. Grasp the string with three fingers. You can place three fingers beneath the arrow, or two under and one over. Either way is fine, however, placing all three fingers beneath the arrow will bring it closer to your eye and increase accuracy.
  2. Pull the string towards your face so the arrow is directly beneath your right eye (or left eye if you’re left-handed).
  3. Find your anchor points. Anchor points are spots on your face where your string and hand touches. You must touch the same points with every shot. The best anchor points are a) the string touching the side or tip of your nose, and b) a fingertip (usually the middle finger) touching the corner of your mouth.
  4. Look though the string, or just to the side of it, while aiming down the arrow shaft at the target. Some archers literally look through the string, while others pull the string slightly to the outside of the eye. It’s a matter of personal preference. The important thing is that the string is close to your eye and pulled to the same spot every time.
  5.  Point the tip of the arrow at the target and release. Your bow’s draw weight and distance to the target will dictate where the tip of the arrow is in relation to the the target. The farther you get away from the target, the higher you must hold the tip of the arrow to account for the arrow’s arc. The distance at which the arrow tip is on the bull’s-eye is called “point-on.” Point-on is the best reference for aiming. At distances further than point-on, you’ll hold the arrow tip higher. At closer range, hold the tip lower on the bullseye.
The distance at which the arrow tip is on the bulls-eye is called "point-on."
The distance at which the arrow tip is on the bulls-eye is called “point-on.”

A different style of aiming is known as intinctive shooting. With instinctive shooting your focus is solely on the target rather than the arrow tip. After dozens and dozens of arrows, you will gradually fall into a natural shooting rhythm in which aiming is unnecessary, similar to throwing a baseball.

Either aiming technique is fine. In time you’ll figure out which works best for you.

Aiming Compound Bows

Modern compound bows generally use a round front sight and a round, rear peep sight built into the string. As you draw the string to your aiming eye, the small peep sight becomes a larger, dark, blurry circle approximately the same size as the round sight on the front of your bow. The bow is aimed by bringing the circles together, similar to a rifle scope.

Inside the front sight there are fiber-optic, glowing pins (anywhere from one to seven). The pins are set at measured distances from top to bottom. The top pin is usually set at 20 yards and each lower pin is set at ten yard increments. So at 30 yards you would use the second pin down, at 40 yards you’d use the third pin, and so on.

It’s important to remember that you are aligning the two circles into one circle, and then placing the sight pin on target. Beginner archers sometimes make the mistake of aligning the rear sight with the front pin instead of aligning both sights together (see examples below).

CORRECT sight picture.
INCORRECT sight picture. Align both circles BEFORE placing the pin on target.

Conclusion

For the beginner archer, compound bows can be more difficult to shoot than traditional bows (recurves and longbows) because of all the extra parts. But once you get accustom to the extra step of aligning the two circles,  you’ll quickly learn to shoot compound bows just as accurately or more.

All you have to do is align the front and rear sights, put the pin on the  bullseye and touch the trigger release (or let go if you’re using your fingers). The bow really does all the work for you.

The basic fundamentals of archery apply to both traditional and modern bows. The main difference is how they are aimed. In my beginner classes I always start my students with traditional bows and work up to modern compounds. After that, it’s up to the student to decide which weapon he/she feels most comfortable with.

Secret Bowhunting Tip #5: Enlarge Your Consciousness


arrowheadEnlarge your consciousness. If your consciousness is small, you will experience smallness in every department of your life.
  –Robert Pante

Secret Bowhunting Tip: Enlarge Your Consciousness

I always wanted to find an arrowhead. I always felt a great romanticism in stumbling across an ancient bowhunting artifact that paralleled my own plight as a modern hunter. Well, in 2013 it finally happened. On opening morning I headed out across a steep ridgeline on my annual quest for deer. I laid my bow on the ground and pulled up my binoculars to view the new surroundings. When I reached down to pick my bow up, I noticed a small, shiny, black object lying right next to my bow. My heart leapt! For a second I imagined an ancient hunter following his instincts—just as I had that morning—and walking the same path that I was on. It was a wonderful, serendipitous moment.

Big bucks are like arrowheads. What I mean is, you might hunt for years and years without seeing a truly giant buck. But given enough experience, inevitably you’ll stumble across one. Still yet, it may take several more years before you actually get an arrow in one. But if you persist in strengthening your skills and keeping an open mind, one day you’ll wrap your hands around some trophy antlers. After that, it won’t feel impossible anymore, but inevitable. It’s all about enlarging your consciousness.

Two weeks after finding my first arrowhead, I found a second one. I was hunting an entirely different section of the unit, and after setting up camp I hiked to a nearby stream for some water. Just before I got there, my eyes locked onto another black, shiny object. This arrowhead was even bigger and more perfect than the first one. I’m not sure it was entirely coincidence.

Bigger bucks are like bigger arrowheads. It might take many years to finally bag a big buck, but once you do, they come easier. That was also the case in 2013 when I found two arrowheads and bagged the biggest buck of my life, dubbed Superbuck. The story I wrote for that deer was based entirely on building greater success off of previous success.

Entrepreneurs frequently tell a similar story: It took them years and years to earn their first million dollars, but only a short time and a lot less effort to earn their second million. As it turns out, success has more to do with our state of mind than anything else.

So, what does it mean to “enlarge one’s consciousness? When I first read this quote, I asked myself the same thing. Was I infinitely UN-successful in my finances, relationships, hunting, etc., because my vision of life was too small? Was I limited by my physical brain capacity to have a small consciousness? Was I limited by negative influences during my formative years? Yes, I think so. But I wasn’t going to let that stop me from having success in bowhunting. What I needed to do was enlarge my consciousness beyond the old-fashioned style of hunting that mostly leads to failure. So I struggled, studied, and fought against mediocrity, and after years of doing my own thing, I was finally a trophy hunter reborn.

When I set my annual goal to harvest a trophy deer, I envision a real monster buck with huge mass and a wide, sweeping set of antlers. I am conscious of the fact that there are at least one of these stud-bucks in every general unit in the state; I just have to find it. I can set this goal because I know I will consciously and subconsciously do things differently than most hunters who are just hoping to luck out on a nice four-point. I am also conscious of the near impossibility of the goal, but instead of getting discouraged, I just try harder. As it turns out, life is about dreaming big and expecting excellence.

I always wanted to find an arrowhead, and now I’ve found two. I always wanted to shoot a 200-inch trophy buck, and now I have two. I’ve always wanted to enlarge my consciousness, and now I have too.

Click here for the next tip, Secret Tip #6: Put in the Time

Secret Bowhunting Tip #4: Hunt Alone

n8_Jake2

Secret Bowhunting Tip #4: Hunt Alone

As a young hunter I frequently hunted with a buddy, whether it was out of fear of being alone or just to have some company. But in most cases we both failed to get a deer. Consequently I quickly learned to hunt alone.

The main reason why you shouldn’t hunt with a partner is because it doubles your scent, noise, and visibility to the deer. And since a partner will probably be chatting about something, it actually triples the noise you’d normally make.

An equally important reason to hunt alone is because another person is prone to challenge crucial decisions you might make when relying on your hunting instincts. Oftentimes, and for no logical reason, I’m suddenly compelled to go left instead of right. But my hunting partner is simultaneously compelled to go right! Or maybe I feel strongly about traveling uphill, but he thinks we should go down. So instead of making a simple, subconscious, instinctual decision to  do anything, you stand in the woods arguing your case. Finally you reach a compromise, and instead of going left or right, you go straight ahead into failure.

The problem with compromising—or splitting the decisions equally—you shoot each other in the foot. Your God-given instincts are rendered useless. You cease to be a predator and become a lemming. That’s the main real reason I hunt alone. Other than elk hunting where you might need a caller, or if you happen to be mentoring a youth or novice hunter, I can’t think of a single situation where it would be beneficial to hunt with another person.

That being said, each year I participate in other people’s hunts, whether it’s my son, my wife, a friend, or a family member. It’s important to pass along bits of the wisdom or woodcraft to the next generation. But these are special cases, and I’m usually not the one hunting anyway.

Sometimes, out of pity or just for fun, I’ll let someone tag along with me on a bowhunt. Some people just haven’t learned to hunt alone, or maybe I’m bringing someone to a new area and want to show them around. What I’ve noticed with most “buddy-hunters” is that they’re usually stubborn know-it-alls. The reason they don’t hunt alone is because they haven’t learned that they should. These people sometimes heed my advice, but for the most part they go right back to doing their own thing, but rarely having success. When I hunt with these people, I have little expectation for success. Sometimes I don’t even take my bow out of the sling.

One of the greatest lessons I’ve learned in life is that you can’t help people who aren’t willing to help themselves. You can lead them to the best areas, but they’re gonna make the same mistakes they always made: underestimating deer, making too much noise, moving with the wind instead of against it, over-packing, resting when they should be moving or moving when they should be sitting.

When hunting alone, safety is a much greater concern. Some areas—such as the High Uinta Mountains—are just too big and rugged to venture into alone. One false step and no one will ever find your body. But that doesn’t necessarily mean I should hunt with another person. I’m really camping with them. In the morning when the hunt begins, I’m going out  on my own. In dangerous areas it’s good to have someone else in the general area—just not right next to you.

In two decades of bowhunting, I haven’t arrowed a single animal with someone standing next to me. Bowhunting is not a team sport. If you have a regular hunting partner, that’s great. Just make sure you set out in opposite directions when your hunt begins.

Click here for the next tip:  Secret Bowhunting Tip #5: Enlarge Your Consciousness

Secret Bowhunting Tip #3: Be Patient

video_Still_008

Secret Bowhunting Tip #3: Be Patient

Never underestimate a buck! If you hunt long enough, this will ring loudly in your head. Bowhunting is a game of patience. Rushing in on any animal usually results in failure. Here are some examples.

Patience Example 1

A few years ago I went elk hunting with a person whose name isn’t Joe, but let’s call him Joe. After a long, fruitless, half-day hunt, we finally spotted a herd of cow elk bedded on a steep hillside. Since I was holding out for a bull, I let Joe lead the charge on the unsuspecting elk. What transpired was a little ridiculous.

I crouched behind Joe as he steadily climbed through the thick scrub oak towards the elk. There were probably 20-30 animals total, but we could only see bits and pieces of them. As we got closer, a bedded cow came into full view at about 90 yards and was looking right at us. I pleaded with my Joe to slow down and wait for one to feed into view, but he persisted forward, trusting in his camo to fool the elk’s eyes. At about 40 yards the bedded cow leapt from its bed and blasted away, taking the whole herd with it. Surprise, surprise.

Had Joe been just a little patient, I’m certain he would have gotten a shot. The wind was perfect and the cows couldn’t see us crouched in the brush. Some of them were even feeding around us. They felt safe and weren’t going anywhere. Even if it took two or three hours, inevitably one of the cows would have wandered close enough for an easy shot. Instead, we went home empty-handed.

Patience Example 2

In 2012 I was hunting the extended hunt for deer. On the second day I spotted a massive, tall-racked, mature 4×4 buck. He was a true giant. Unfortunately, I spotted him late in the morning as he was bedding down with a group of does. The ground was blanketed with crunchy snow and I knew it would be nearly impossible to stalk close. But I had to try. For the next seven hours I worked carefully into the area. As I got closer I literally had to break the frozen ground with my hand before placing my foot down. It was the most arduous stalk of my life. Finally, I knew I was close, but the thick oak brush made it impossible to see anything. So I just sat and waited.

Right around 4 pm I heard the crunching of hooves in the snow. By some miracle, the group of deer were up and feeding in my direction. Long story short, the buck appeared briefly in the only window I had. I misjudged the distance and sent an arrow sailing harmlessly over the giant buck’s back. Game over.

Although I failed with my shot, I succeeded in my stalk—a stalk that burned up then entire day. The failure still stings today, but not as bad as if I’d simply rushed in and blew out the deer.

Conclusion

In bowhunting, the hunt only just begins when a deer is spotted. Having patience and getting close is the real challenge. But if you are patient, there is almost no buck you can’t get close to. Since hunters are really predators, we can learn from studying other predators. Have you ever watched a lion stalk a gazelle on TV? Have you noticed how carefully, calculated, and slowly it’s done? Wild predators have innate and instinctual patience. Otherwise they will starve.

Next time you’re on a stalk, remember the lion in the grass. He might not be successful every time, but he never gives up and he moves with eternal patience. Be a predator; be patient and let nature unfold at its own pace.

Click here the next tip: Secret Bowhunting Tip #4: Hunt Alone

Secret Bowhunting Tip #2: Success is a Decision

esther

Secret Bowhunting Tip #2: Success is a Decision

It took me half a lifetime to really understand that success in bowhunting is a decision. Failure comes not from luck, but from failure to commit to the goal. The decision to succeed is not made a week or two before the hunt, but the very second the last season ends.

Setting Goals

In sharing this insight with other bowhunters, I’m usually met with some hesitation. They want to agree with the premise, but don’t really understand it. So let me explain:

When I make the decision to succeed—to arrow a great buck—I set a goal for the entire year. And it’s not just any goal, but the most difficult goal to reach. It’s so difficult because there are just too many variables in bowhunting and no guarantees. What if I simply can’t find a good buck this season?

By setting such a lofty goal, one’s mind begins making immediate preparations to accomplish it. Throughout the year, this goal is broken down into planning, studying, shooting, equipment preparations, mind-set, and a myriad of other sub-goals.

Keeping this primary goal in the forefront of my mind, I find myself making daily decisions to achieve it. One example is to block out my intended hunting dates on the calendar. No matter what opportunity or responsibility arises, I absolutely refuse to alter my schedule. This year alone I’ve turned down two potentially profitable jobs that would’ve interfered with my hunt dates.

Admittedly this can be very difficult for some people. Most jobs will allow one week off work, or two if you’re lucky. The sad fact is, if you let your all-important job interfere with your hunting schedule, then you can’t set the goal in the first place. The decision isn’t yours to make.

Setting such big goals sets a precedence upon which failure is not an option. If you are truly committed to a goal, subconsciously you will make mental and spiritual goals which you aren’t even aware of; goals which will seemingly magically bring you and your quarry together into a single space and time. I believe there are unseen forces in the universe that want you to succeed; that are willing to help you if you let them. You just have to want it bad enough. This is the only way to beat bad luck.

Conclusion

As mentally and physically prepared as I might be, bowhunting often feels overwhelming at times. I believe that bowhunting trophy bucks–both successfully and consistently–is the hardest thing a person can do. I also know that there are greater forces at work than I can ever understand which increase my odds. Some call it the power of positive thinking. Some call it Zen hunting.

There is nothing more magical than the breaking dawn of a season opener. And there is nothing more deflating than last light of an unsuccessful season closer. I have no intention of ever experiencing a failed season again. I’ve made the decision!

Click here for my Secret Bowhunting Tip #3: Be Patient

Step #4: Releasing the Arrow

How to Release an Arrow:  Traditional Recurve and Compound Bow

In this lesson you will learn how to properly release an arrow.

Nocking an Arrow with Traditional Bows

The end of the arrow has a notch in it called an arrow “nock”. The nock attaches to the string just below the “nocking point.” The nocking point is a fixed point on the string that aligns the arrow with the bow for every shot. On most bows, the nocking point is a small brass bead clamped onto the string. The arrow attaches–or nocks–onto the string right below the nocking point. (see photo below)

With traditional archery (longbows and recurves), the arrow has three feathers One feather is a different color and is called the “cock” feather. When you nock an arrow, be sure the cock feather always points out, away from the bow. This keeps the feather from deflecting off the bow. (see photo below)

003
Odd-colored feather always points out.

Nocking an Arrow with Compound Bows

With compound bows, the orientation of the cock “vane” (compound bows have plastic vanes instead of feathers) depends on your arrow rest. The most common arrow rest for compound bows is the drop-away rest. With drop-away rests, the orientation of the cock vane isn’t important as there is no contact with the bow.

With shoot-through, containment style rests like the Whisker Biscuit (as seen below), the cock vane must point upwards. The Whisker Biscuit has stiff bristles on the bottom that support the arrow.

031
Compound bow with a Whisker Biscuit arrow rest. Notice how the cock vane points upward to avoid contact with the lower stiff bristles.

Anchor Point

The next step is to acquire an “anchor point”. Anchor points are two or more spots on your face where your release hand or string comes in contact with your face. Anchor points are vitally important to consistent shooting and accuracy. Therefore you must establish consistent anchor points from the outset.

Anchor points are different for everyone, but most commonly are:

  • the string on the tip of your nose
  • a finger touching the corner of your mouth
  • side of thumb touching your jaw bone
  • arrow fletching touching the face

When shooting a compound bow I make sure the string touches the tip of my nose and the side of my thumb touches the back of my jaw.

On traditional bows, the string touches the side of my nose and my first (or middle) finger touches the corner of my mouth.


023
Compound bow anchor points are: String on nose and thumb at back of jaw bone.
007
Traditional recurves bow anchor points are: String touches die of nose, finger touches corner of my mouth.

Note: Many beginner students are afraid to have string contact with their face. This is totally unwarranted because when you release the arrow, all the energy leaves your face unscathed.

Now we are ready to shoot an arrow!

How to Release the Arrow

Here are the steps to releasing an arrow:

  1. Nock an arrow on the string below the nocking point. You should hear a soft “click” as it locks onto the string. On compound simply attach the mechanical release aid to the D-loop.
  2. Grasp the string with three fingers. Your three fingers will hook onto the string at the first joints of your fingers.
  3. Pull the string across your chest, not towards it, and align the string with your eye. Essentially you should split the target with the string and look down the arrow to aim, but keeping your focus on the target, not the arrow.
  4. Back tension release: As you draw the bow, your back muscles are doing all the work. Squeeze your shoulder blades together as you bring the string to your face. At the same time, you are pushing the bow forward with your bow arm.
  5. Establish your anchor points on your face.
  6. Aim with the point of your arrow while looking through the string at the target. With a compound bow, place the appropriate sight pin on the target.
  7. Release the arrow by simply relaxing and opening your hand. With compound bows you simply touch the trigger of the release.
  8. Follow through. Follow through means that both arms (bow arm and release arm) continue in opposite directions on the shot. This is called “finishing the shot.” Your release hand should continue straight back towards your ear. The last thing you should feel is your release hand brushing past your face and touching your ear. This will reduce oscillation and increase accuracy.
007
Anchor, release, and follow through.
011
Traditional bow follow-through: Hand brushes face and stops at your ear.

 Final Thought

Archery is a complex skill that cannot be mastered in a day, any more than other muscle-memory skills such as golf or skiing. In the movies they make it look easy, and many of my students have the misconception that they can simply pick up a bow and start hitting bullseyes. But without spending a lot of time on the basics, you’ll immediately develop bad habits which will take a long time to break.

Accuracy comes by focusing on each step, one at a time. After many hours–maybe even months–these steps will gradually become one subconscious step called form. Once proper form is established, your only focus will be on aiming. This is should be your goal.

For previous steps on the archery shot sequence, see:

Step #1: Proper Archery Stance

Step #2: Gripping the Bow

Step #3: The Release

Step #2: Gripping the Bow

How to Grip the Bow

The bow arm (or bow hand) is the arm that holds the bow up. It is sometimes referred to as a dead-post because it doesn’t really do anything special, other than hold the bow. That being said, your bow arm has a great effect on accuracy. This applies to both traditional and modern bows.

Bow arm grip.

Steps to Properly Grip the Bow

1.  If you are right-handed, grip the bow with your left hand. First off, you’re not really “gripping” the bow, you’re simply holding the bow and pushing it forward as you draw back. If you grip the bow too tightly you’ll torque it from side to side, causing you to miss left or right.

The best way to avoid torque is to lightly touch the tips of your thumb and index finger together and allow your other fingers to remain relaxed.

Use a loose grip on the bow to avoid torque.

2.  The bow’s grip should settle in the “throat” or “V” of your hand (between your thumb and index finger.) The grip should also line up just to the thumb side of your “life line.” In other words, the bow is supported by the big, fleshy part of your lower thumb.

For maximum support, keep your wrist straight and in-line with your forearm bones (as seen in the photo above). If you allow your wrist to bend outward it will cause the bow to settle at the base of your thumb, which causes movement. As you relax your grip on the bow, you will feel the bow settle at a balanced fulcrum point in the throat of your hand.

Correct wrist alignment.
Incorrect wrist alignment.

3. The most common mistake for beginner archers is to allow the elbow to bend downward. This increases the chance of slapping your arm with the string. Therefore, you must draw with your elbow up and bent slightly outward.

Elbow up and bent slightly outward (CORRECT).
Elbow pointed downward (INCORRECT).

4. As you draw the bow back, your bow arm pushes the bow forward. Remember, your back muscles are doing all the work. As you squeeze your shoulder blades together, your bow arm and your shooting arm apply pressure in opposite directions. This is called “pulling the bow apart.”

On the shot, both arms continue in opposite directions. This is called “follow through” and will be covered in a future post.

Click here for Step #3: The Release Arm